Audience Tab
The first tab you will come to once you have created a campaign is the 'Audience' tab, the system will guide you through the process so you cannot assign media or metrics to your plan until you have built your audience/s or target/s first.
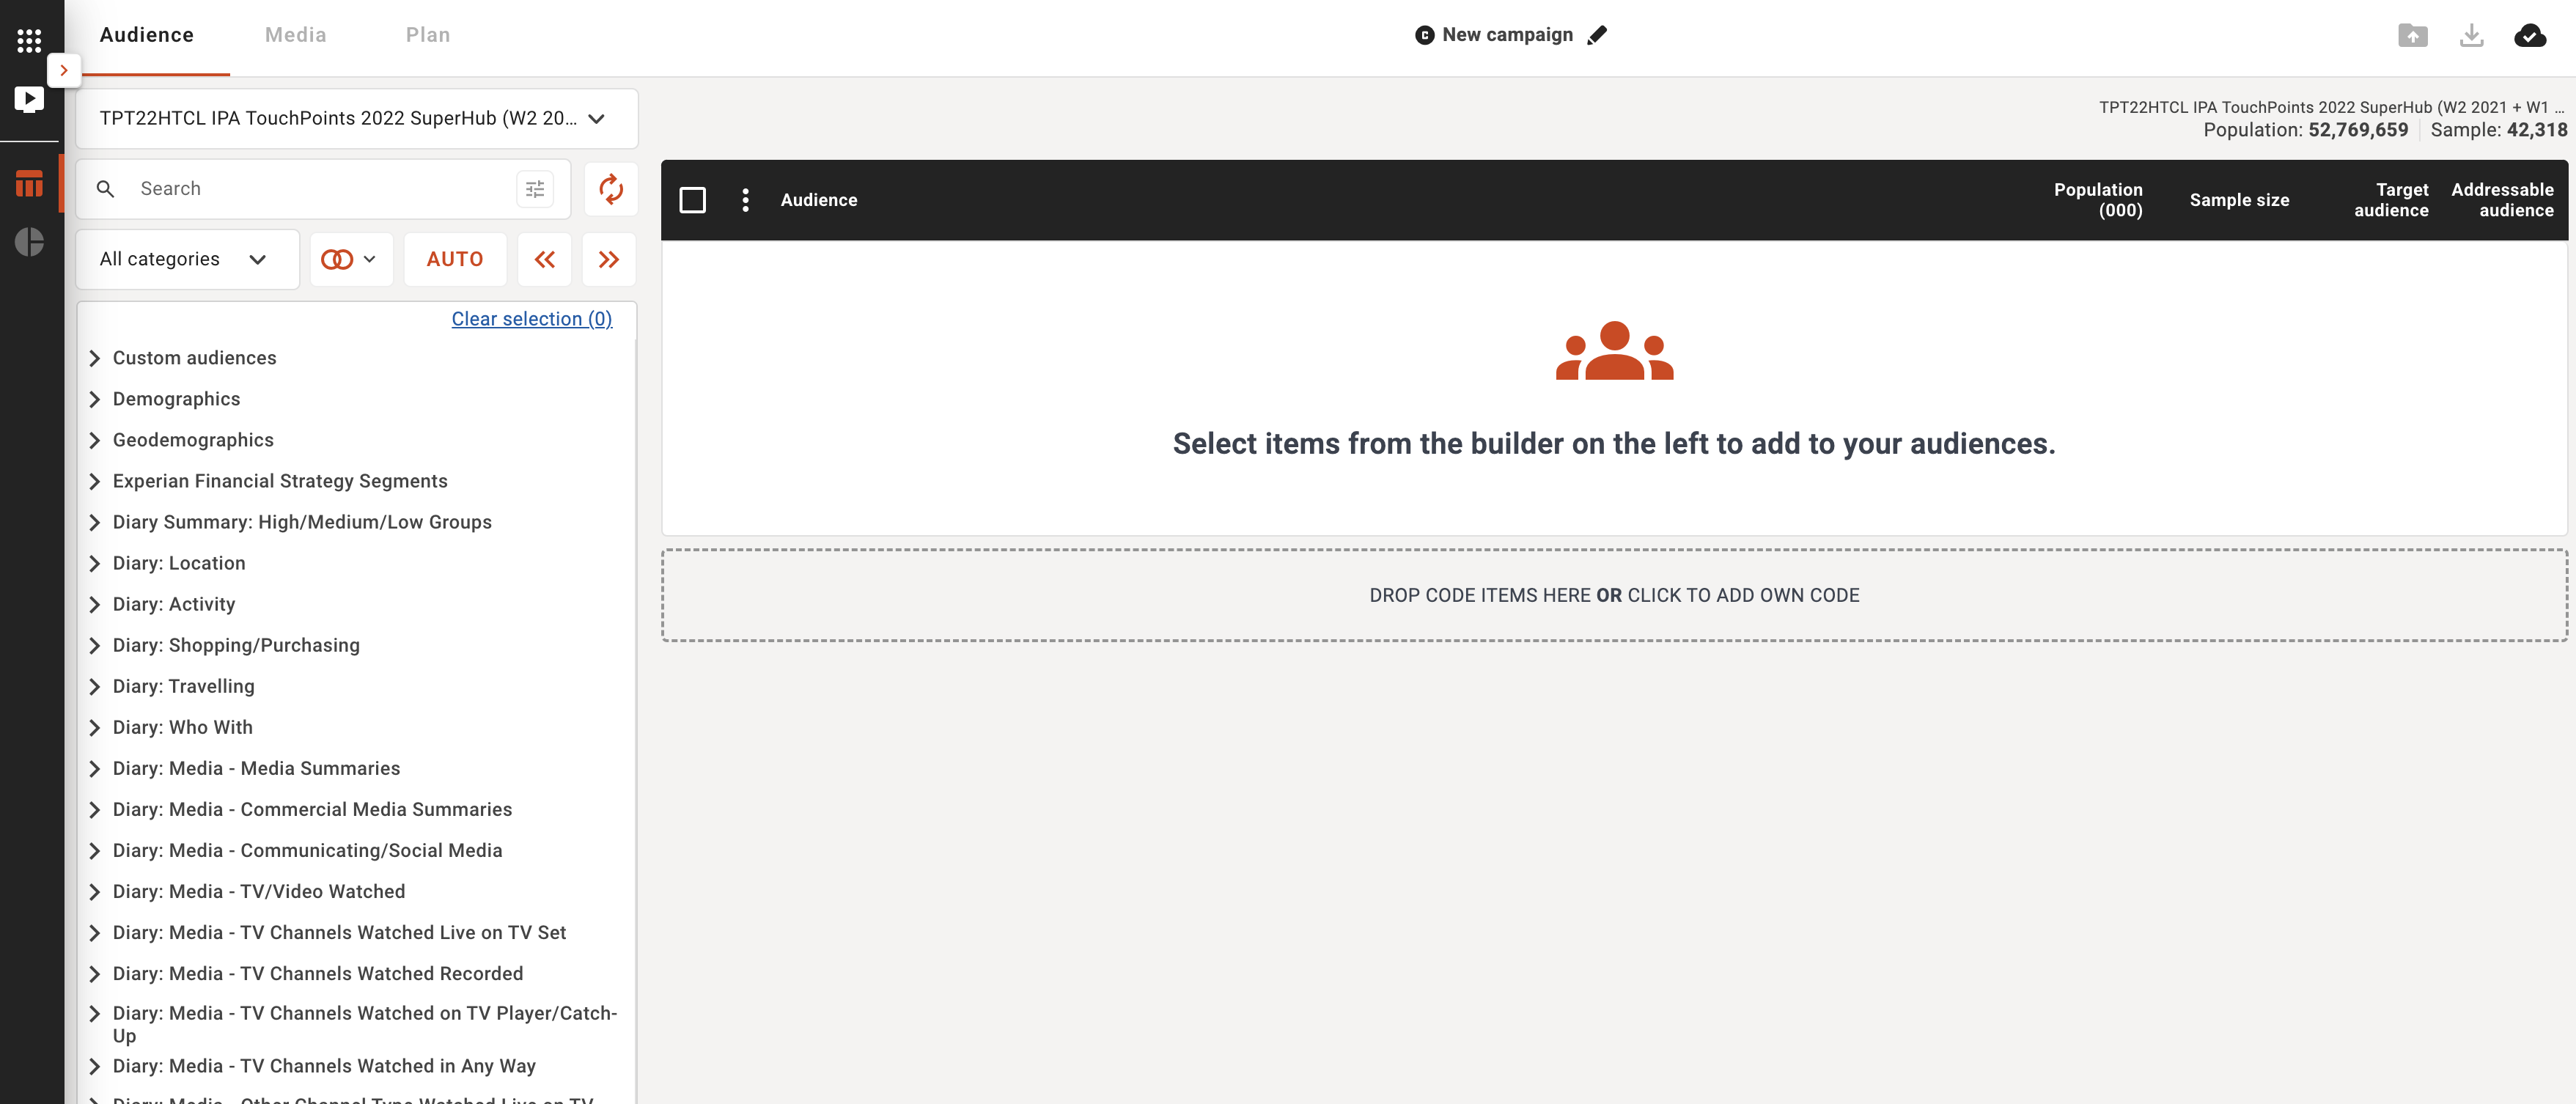
Starting on the top left first we can see:
Survey selection
In the top drop down you can see which survey you are currently browsing/building with, you have the ability to use multiple compatible surveys to build your plan.
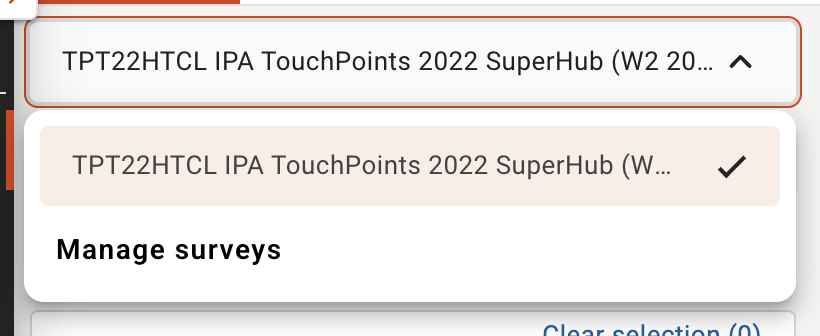
Note: you can change the study by choosing Manage Survey from the drop-down menu which will take you back to the 'Survey selection' pop up.
Data Dictionary
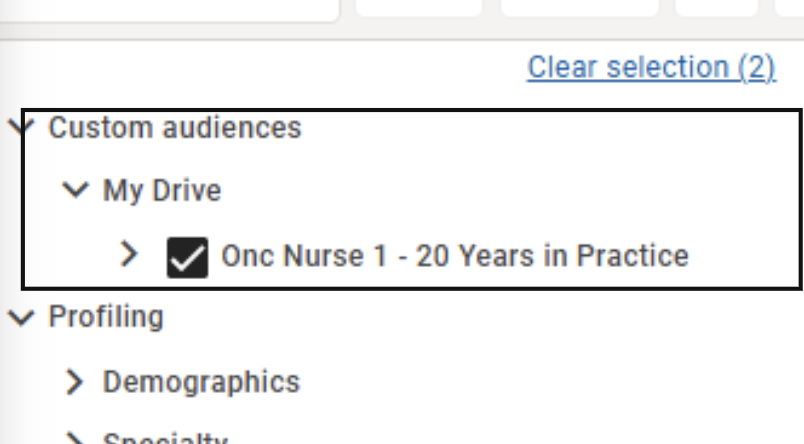
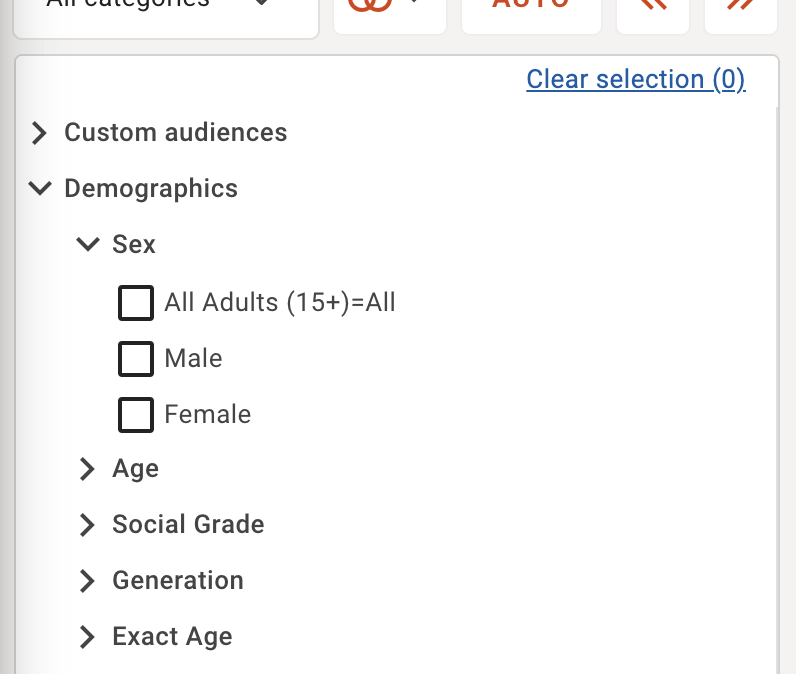
All available study/survey data is shown in the data dictionary on the left hand side of the screen in a tree view control. To build your audience/s or target/s for planning simply select an item from the tree using the check box and selecting either the orange 'boolean' icon to show the application, or the 'auto' or 'arrow' buttons to send straight across or drag and drop them into the audience builder on the right, in the data dictionary you can also see your pre-built saved custom audience/s from your drive and your company drive to use those for easier reusable audience building. Please note custom audiences are saved across the individual survey and are not transferable between surveys.
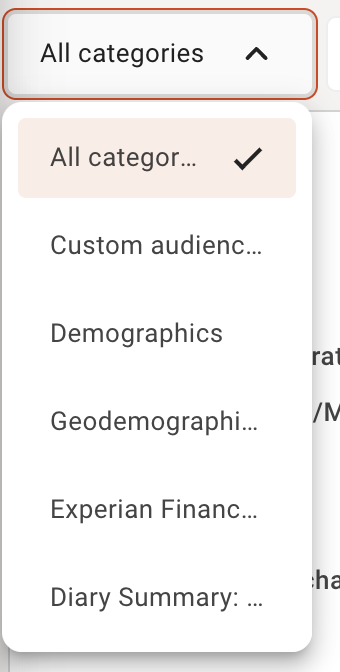
Category Selection Menu
Select 'All categories' to view the full data dictionary or select a specific category to only view that data.
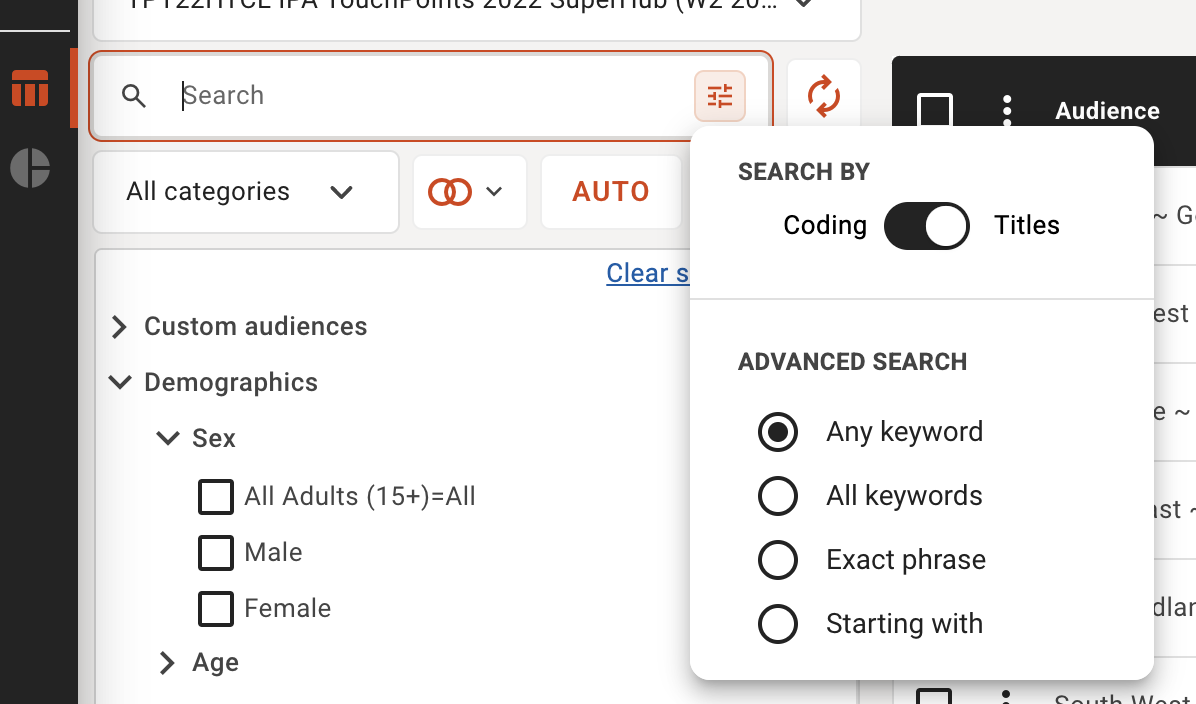
Search the data dictionary
You can search for keywords, phrases, coding and titles with the keyword search and filter. The 'reset' icon to the right of the search box will reset the codebook back to the default master list should you want to clear a search or selection.
Removing audiences in your builder
To remove audiences you can select them on the right and click the orange left arrow icon to send them back, or you can select the 3 dots menu at the top of the audience table to delete multiple audience or individual audiences.
Coding Tools
Utilize the data dictionary and coding tools in the Plan system to create an audience to media plan against.
How to create an audience in the Plan tool
Select your different inputs in the data dictionary on the right.
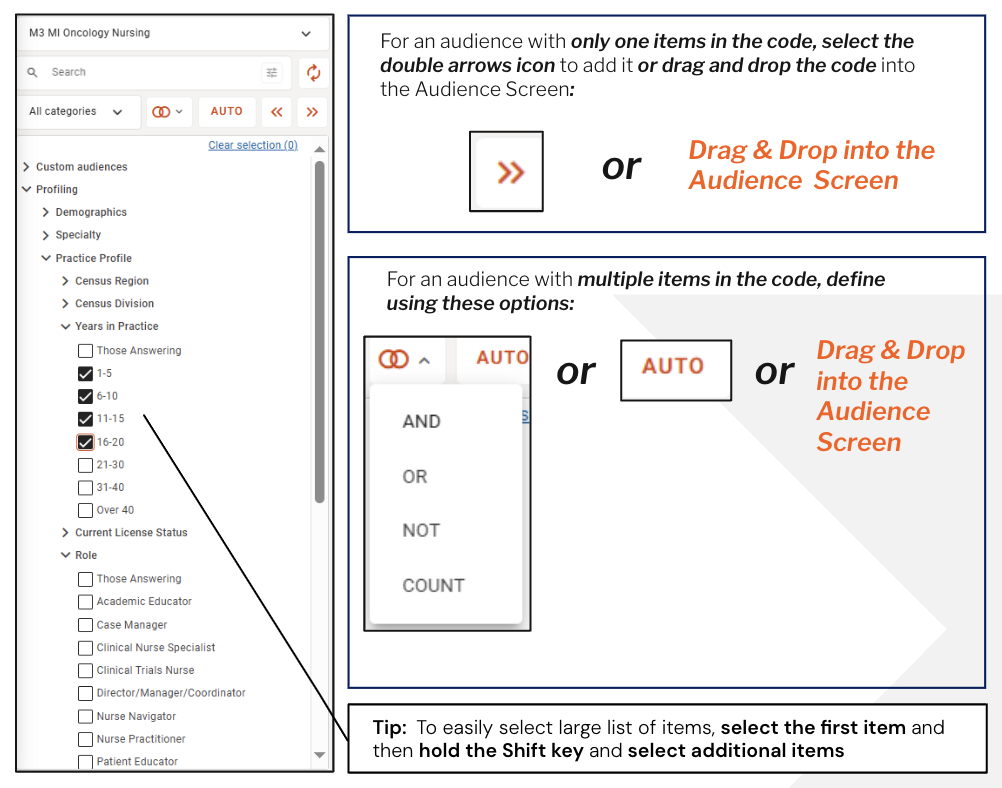
If your audience is just one item, select it in the data dictionary and click the 'right arrow' button to add it to the Audience Screen.
You can also drag and drop the code into the Audience Screen.
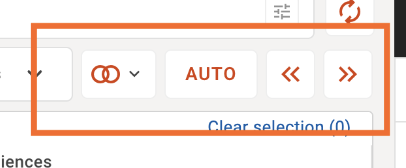
- Auto button
Select 'auto' have the system auto code multiple selections together, for example,- I select 'Age 21' and 'Age 31' from 'Age' in the survey, I then select 'auto'; the system will build an audience which is then 'Age 21 OR Age 31' as a target cannot be both ages.
- I select 'Age 21' and 'Age 31' and 'Male' and 'Female' from 'Age' in the survey, I then select 'auto'; the system will build an audience which is then '(Age 21 OR Age 31) AND (Male or Female)' as a target cannot be both ages or both genders but they can be either.
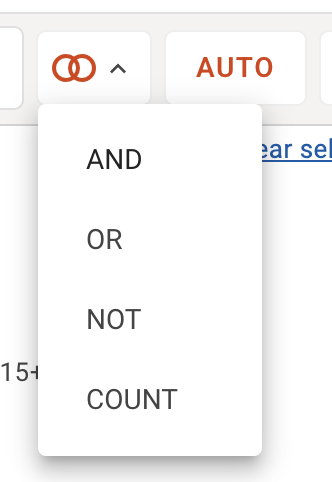
- Boolean logic button (Overlapping Circles)
Select to manually code multiple selections together and choose the application of that selection for creating a target audience.
- Left arrow button
Select an audience created in the builder and remove it by using the left button (ie. sending it back) - Right arrow button
If I select 'Male' and 'Female' and select the right arrow button i will create two separate audiences, one for 'Male' and one for 'Female'. - Drag and drop
You can also select multiple or singular items from the data dictionary on the left and drag and drop them into the drag and drop area to create a new audience, or drag and drop to an existing audience to automatically combine the selection the the audience previously built.

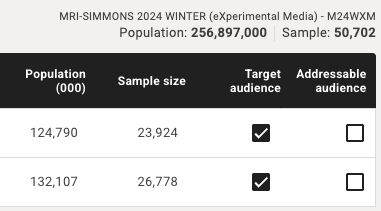
Base Size
Provides you the universe size of your base, includes # of projected population and # of study respondents sample size.
Audience table
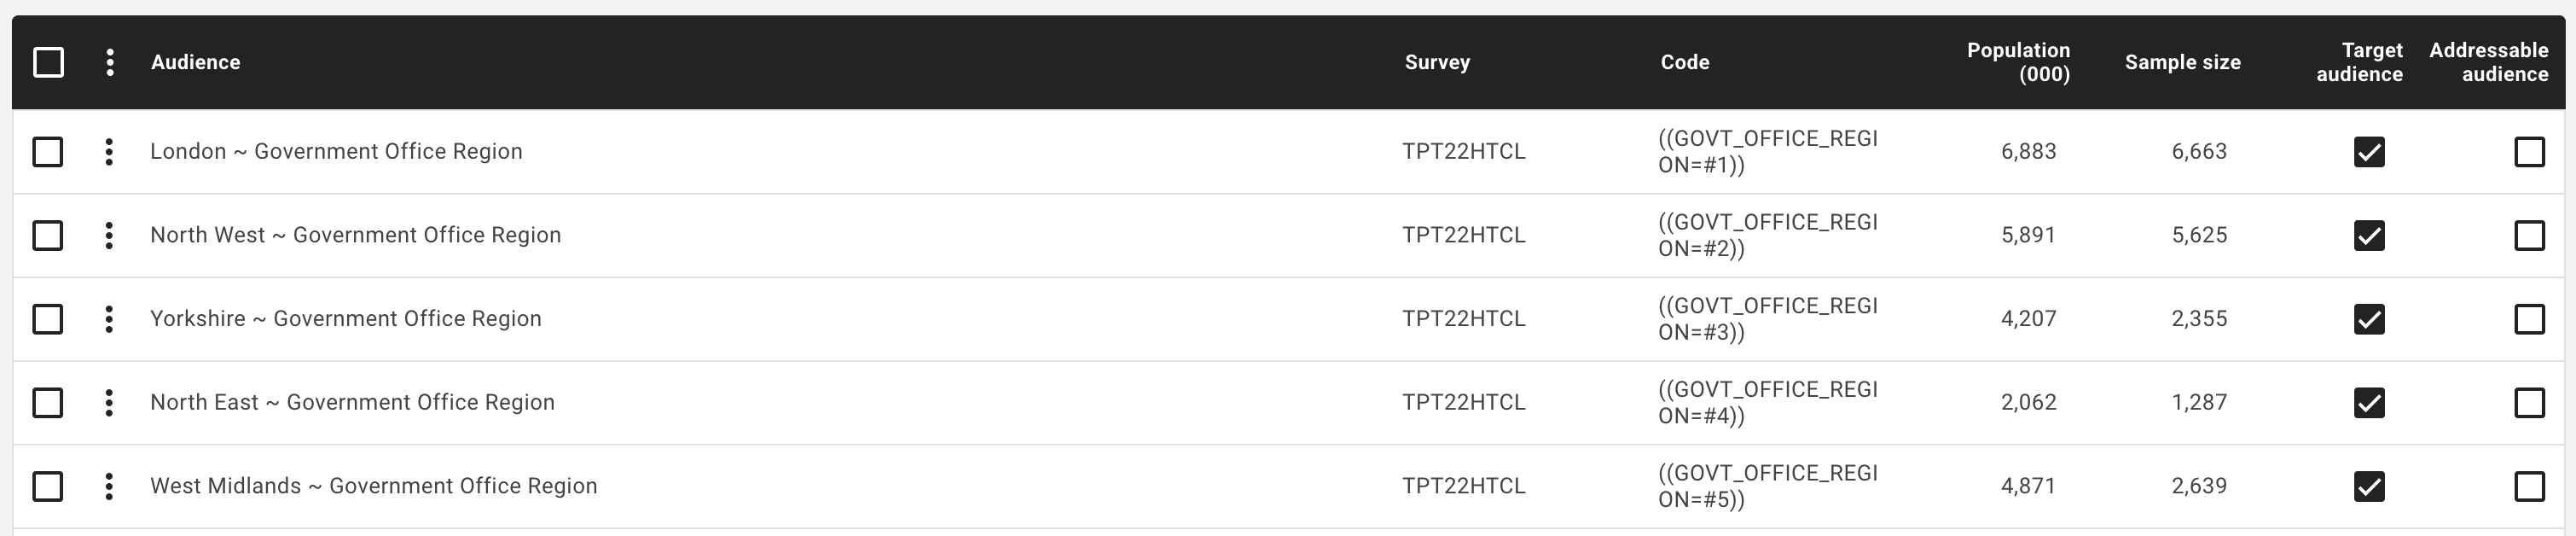
Your defined audiences are shown by:
- Projected population size
- Study respondents sample size
Audiences are automatically created as 'Target audiences' by default, meaning you can plan on that audience, you can also make an audience specifically an 'Addressable audience' which means should you have addreassabloe media in your plan you can apply the addressable audience just to that media item/s in your plan.
- Example; I have a target audience of 'Male' I have an addressable audience of 'Instagram users', I can apply both to my addressable media in my plan to understand the addressable metrics tied to that definition.
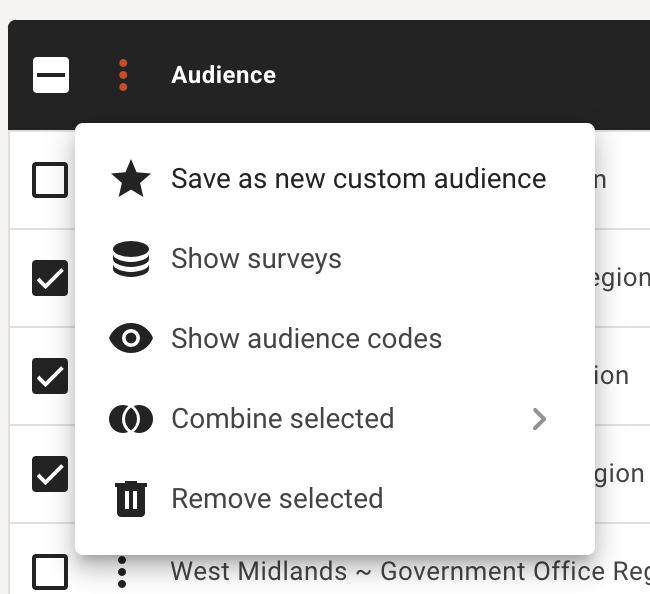
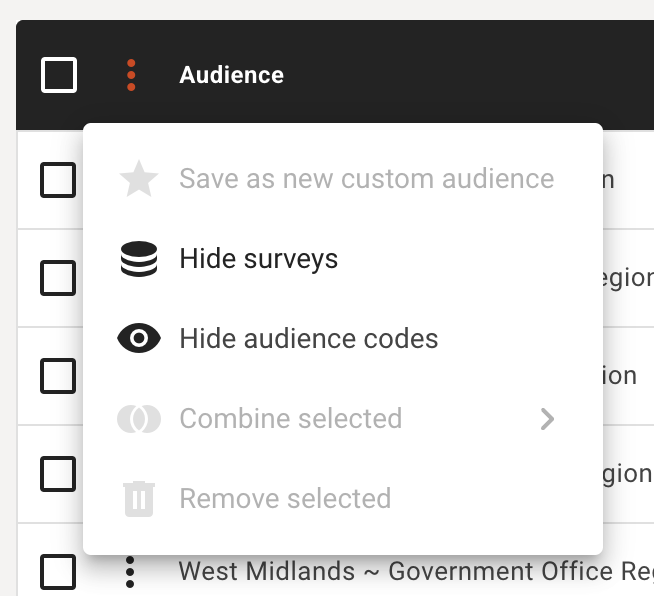
You can add more data such as survey and code view to the audiences by using the menu control on the audience table. You can also select multiple audiences in your audience table and;
- apply more boolean logic via this menu to combine audience
- save as custom audiences to reuse next time you create a plan with this survey
- remove multiple audiences you no longer wish to plan on.
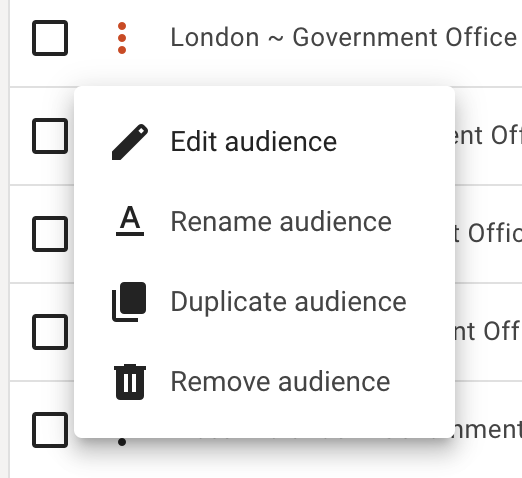
You can also make further adjustments on individual built audience by selecting the adjacent menu icon to:
- Edit the audience
- Rename the audience
- Duplicate the audience
- Remove the audience
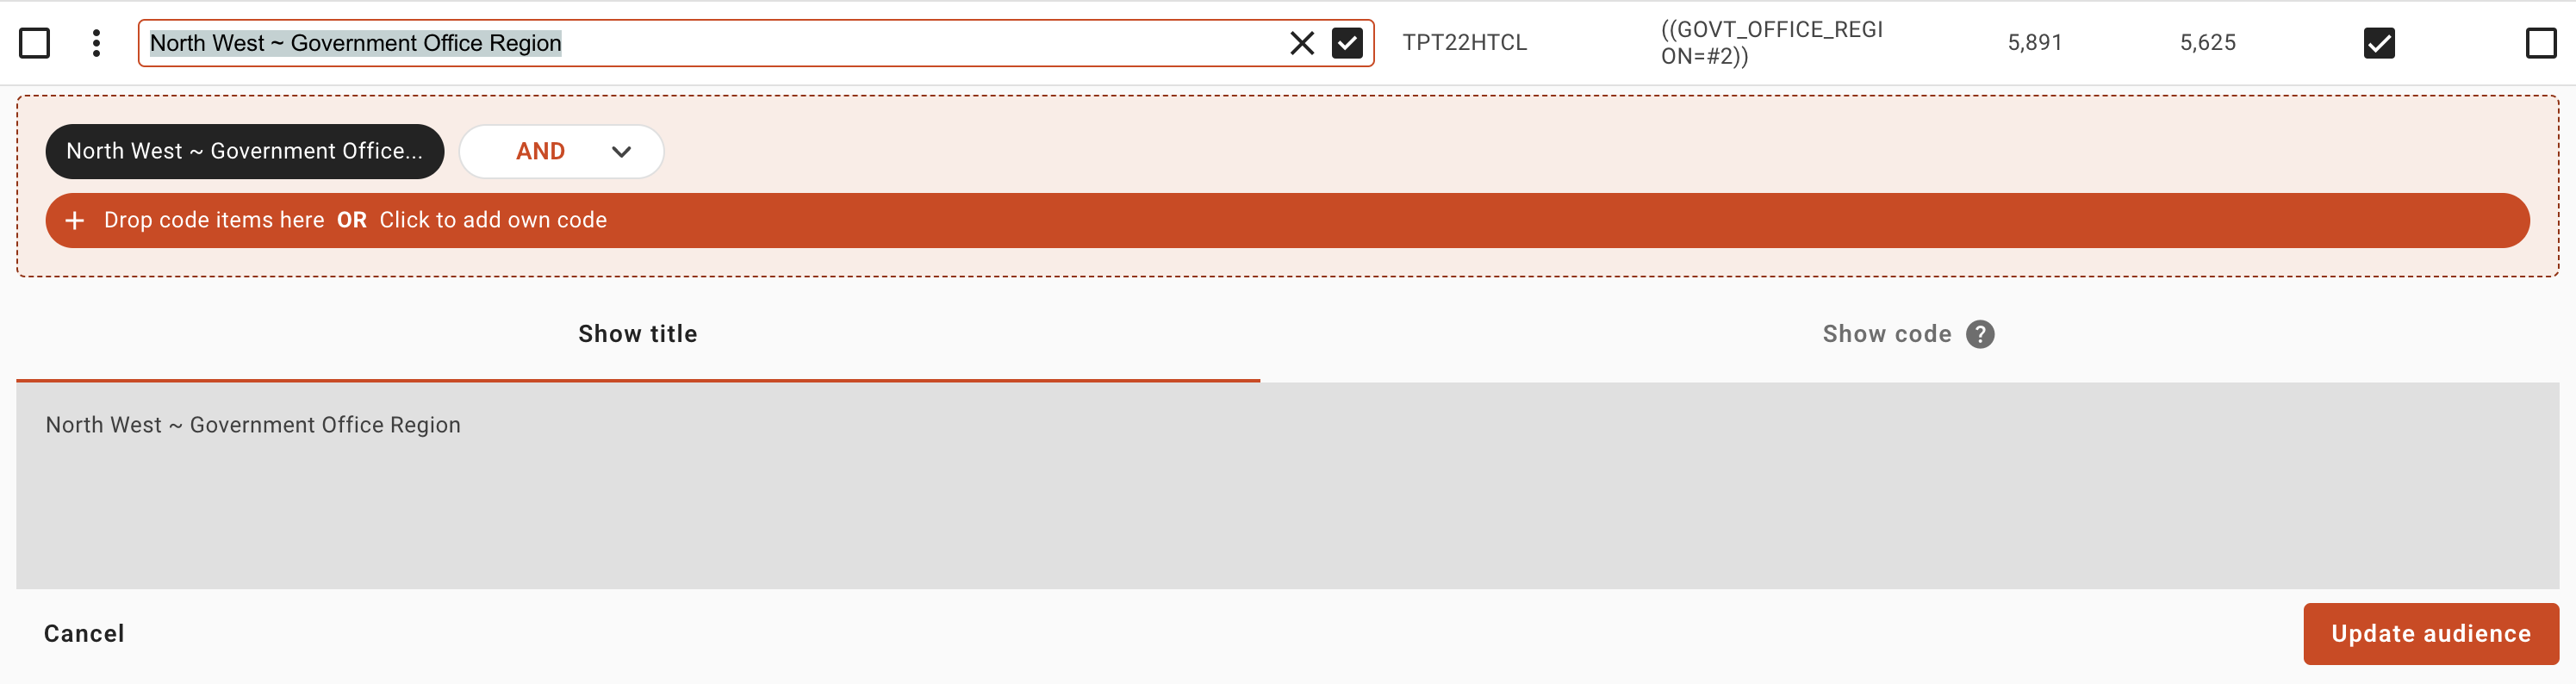
Editing an audience
If I choose to edit an audience the row will expand to show that I can edit the audience name, i can alter the boolean logic, I can drag and drop more items to this audience from the data dictionary on the left, to save the updates I will need to press the 'Update audience' button to proceed, or cancel on the left to leave.
Creating a custom audience
Create a custom audience for regular use by adding it to the data dictionary for easy access.
How to create a custom audience
- Define your audience and add it to the Audience Screen
- Select the checkboxes of the audiences you want to save and reuse in the future
- Select the 3 dots menu at the top of the audience table in the darker header bar
- Choose Save as custom audience in the drop-down menu
- The Save as custom audiences pop-up will appear
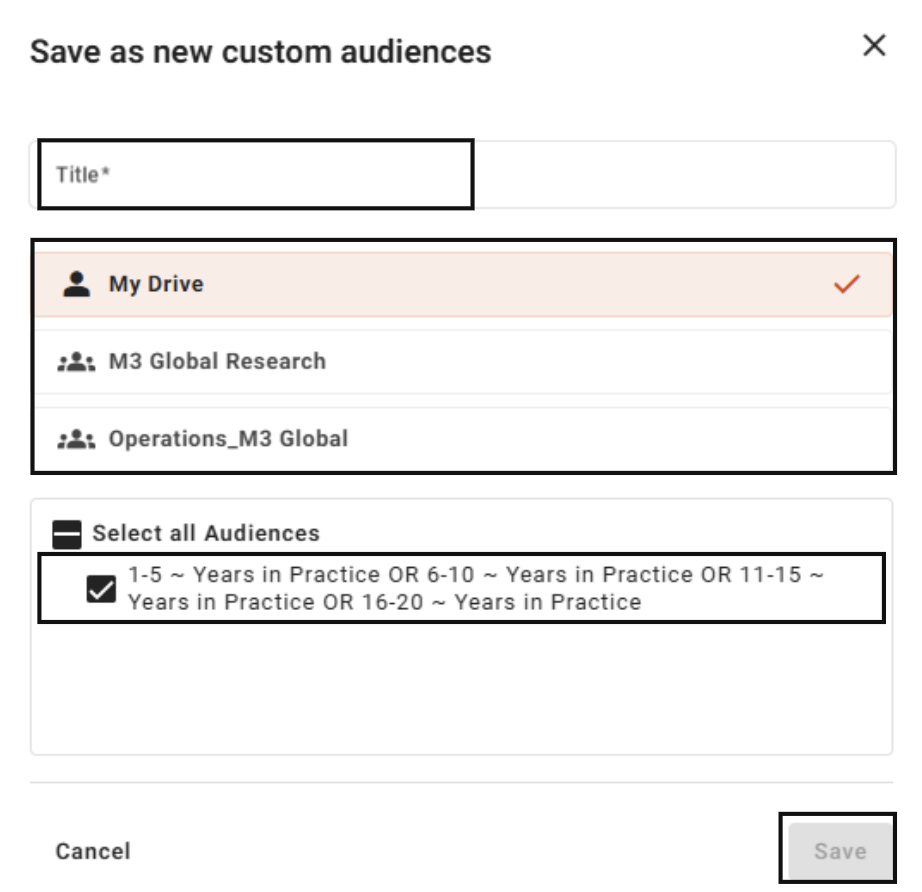
- Name your custom audience
- Select the drive to save it to
- Check the box next to the audience you want to save
- Click Save
- The audience now appears in the data dictionary under Custom audiences whenever you use this survey.