
Media Tab
The second tab you will come to once you have created an Audience is the 'Media' tab, the system will guide you through the process so you cannot assign metrics to your plan until you have selected your media first.
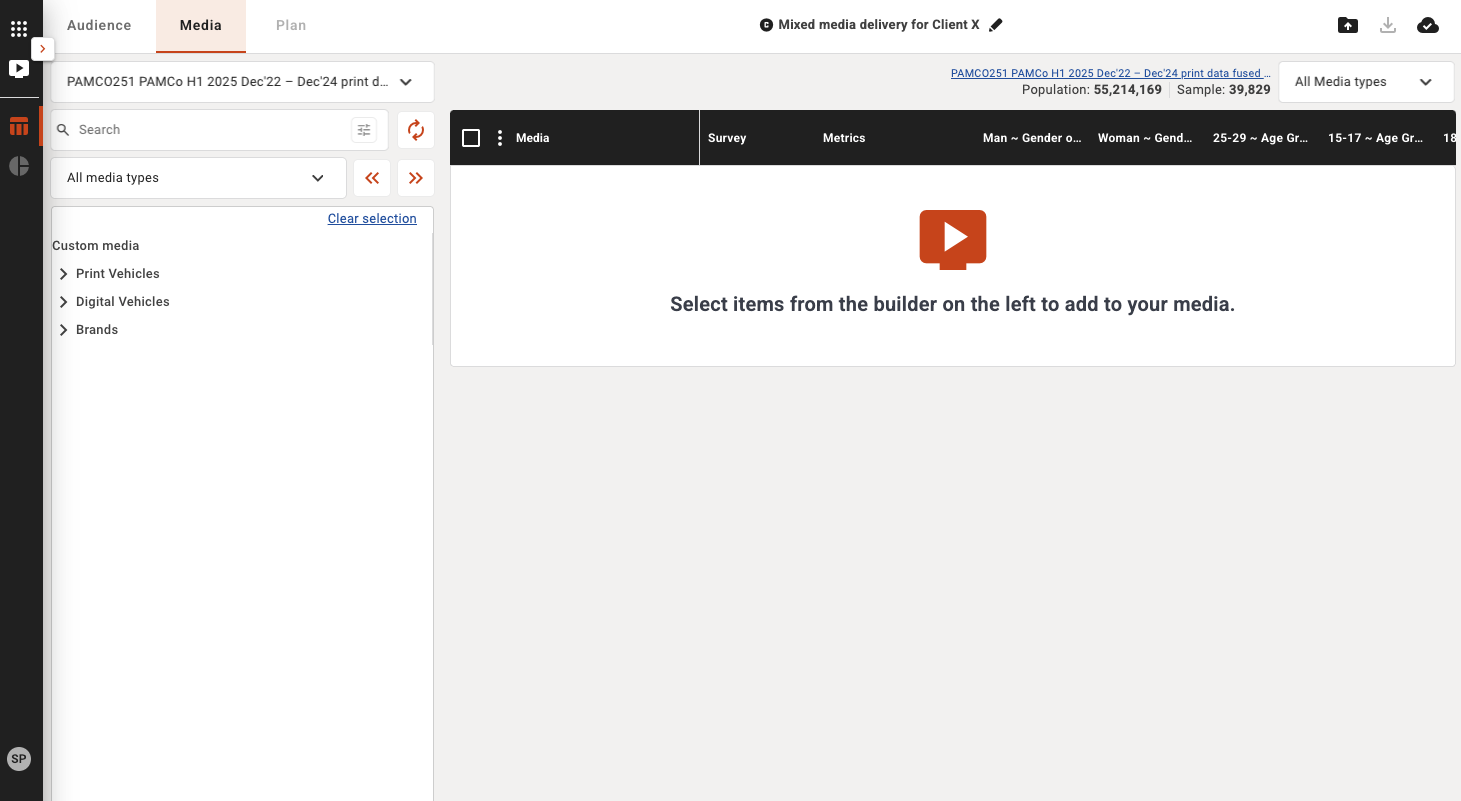
Starting on the top left first we can see:
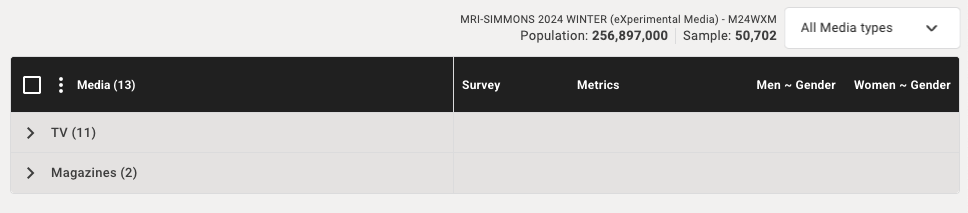
Survey selection
In the top drop down you can see which survey you are currently browsing/building with, you have the ability to use multiple compatible surveys to build your plan. If you have selected more than 1 survey you can change surveys using this dropdown, this will re-populate the data dictionary with the survey data selected and you can then select media from the different surveys you have chosen for this plan.
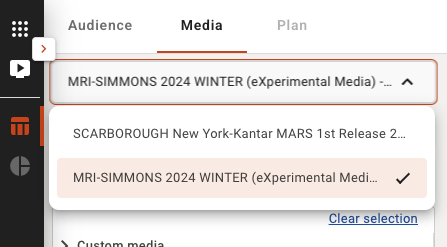
Note: some surveys may be disabled in this view as they are not compatible with the 'primary' survey you have chosen to build your audience.
Data Dictionary
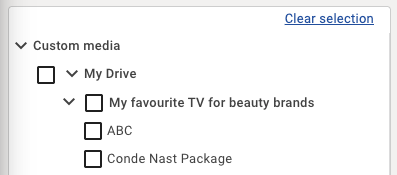
All available study/survey data is shown in the data dictionary on the left hand side of the screen in a tree view control. To build your media selection for planning simply select an item from the tree using the check box and select the orange 'arrow' buttons to send straight across to add the media to your plan or drag and drop them into the audience builder on the right, in the data dictionary you can also see your pre-built saved custom media from your drive and your company drive to use those for easier reusable media selection. Please note custom media are saved across the individual survey and are not transferable between surveys.
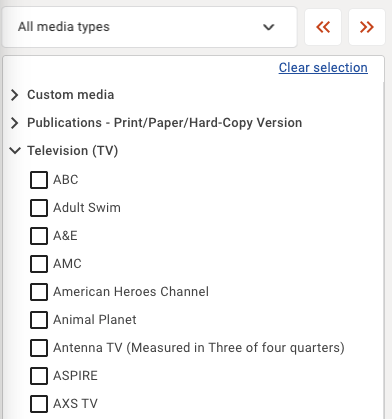
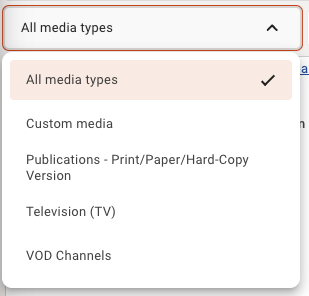
Media Type Selection Menu
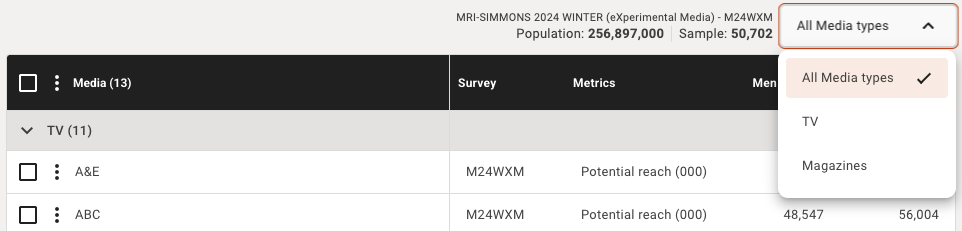
Select 'All media types' to view the full data dictionary or select a specific category to only view that media type, this list will show all main media categories in the selected survey you are working with.
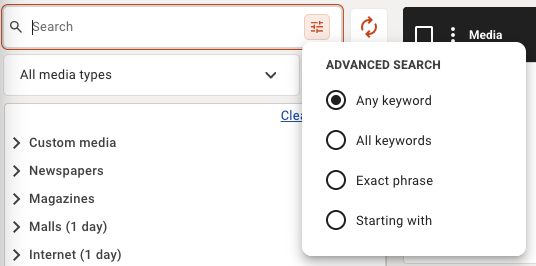
Search the data dictionary
You can search for keywords, phrases and titles with the keyword search and filter. The 'reset' icon to the right of the search box will reset the codebook back to the default master list should you want to clear a search or selection.
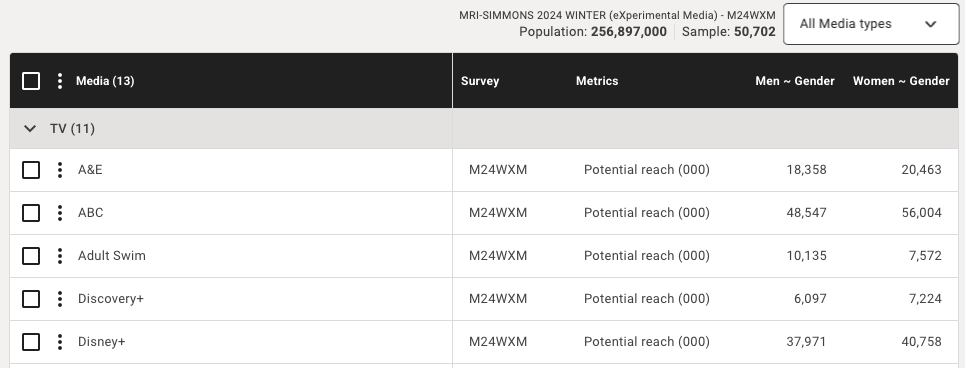
Media table
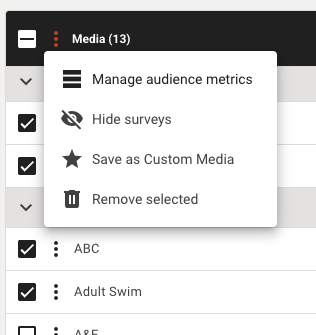
Removing media in your builder
To remove media you can select them on the right and click the orange left arrow icon to send them back, or you can select the 3 dots menu at the top of the audience table to delete multiple media or individual media.
Base Size
Provides you the universe size of your base, includes # of projected population and # of study respondents sample size.

You can hide and show specific media categories by using the top right drop down to filter your tabular view of your selected media vehicles.
You can also expand and close media categories by using the arrows on the left for each media category row to cleanse your view if needed.
Your selected media vehicles are shown by:
- Media channel (grouped by)
- Media vehicle name
- Metrics - Potential reach is the default selection
- Selected delivery for each defined target audience
You can add more data such as survey and other metrics to the media by using the menu control on the media table.
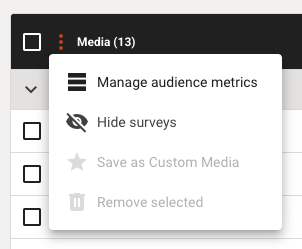
Creating custom media
Create a custom media for regular use by adding it to the data dictionary for easy access. Use the save as Custom media option to reuse preferred media selections next time you create a plan with this survey.
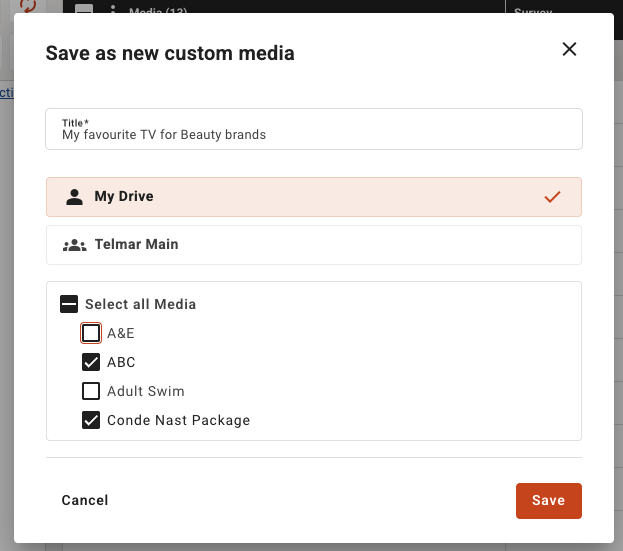
How to create a custom audience
- Select the checkboxes of the media you want to save and reuse in the future
- Select the 3 dots menu at the top of the media table in the darker header bar
- Choose Save as custom media in the drop-down menu
- The Save as new custom media pop-up will appear
- Name your custom media selection
- Select the drive to save it to
- Check the box next to the media vehicles you want to group and save
- Click Save
- The media now appears in the data dictionary under Custom audiences whenever you use this survey.
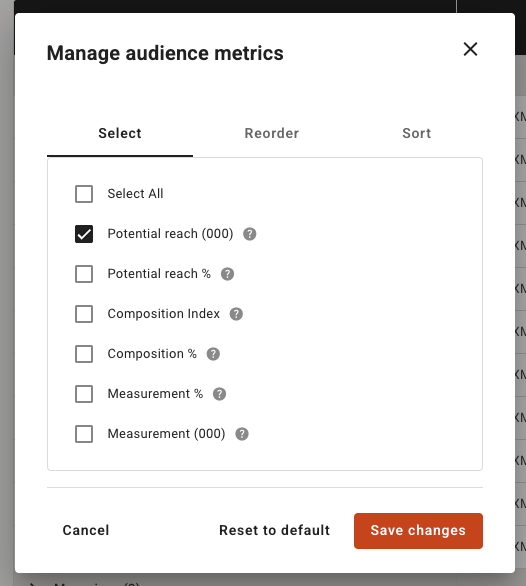
Managing audience metrics
In the media screen you have the option to view various metrics to help decide which media properties to plan with.
How to select different audience metrics for view in the Media tab
Note: the default metric shown is Potential reach
- To view other metrics or remove Potential reach select the 3 dots icon next to Media
- Select Manage audience metrics from the drop-down menu
- A pop-up will appear to select the metrics you want to view for your chosen media properties
- Check the box of the metrics you want to view
- Click Save changes
Audience metrics explained
Potential Reach
- Print - the total readership of the target audience for a print property
- Digital - the number of visitors of the target audience to a digital property in the past 6 months
Composition
- % or # of target audience who have used a media property
Measurement
- Print - the # of average issue readers of a target audience for a print property
- Digital - the average daily page views of a target audience for a digital property
How to reorder audience metrics
If you have multiple audience metrics selected for view in the Media Screen you can reorder them based on priority.
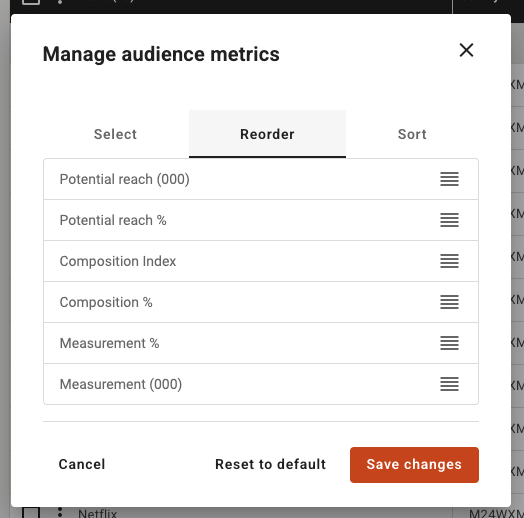
Note: the default option is Potential reach, then Composition and finally Measurement
- To reorder the audience metrics, select the 3 dots icon next to Media
- Select Manage audience metrics from the drop-down menu
- A pop-up will appear go to the Reorder tab
- Click the 3 dash icon next to the audience metric and then drag and drop it to the order you want it to show in the Media Screen
- Click Save changes
How to filter, rank or sort audience metrics
You can rank media properties by sorting audience metrics in the Media Screen.
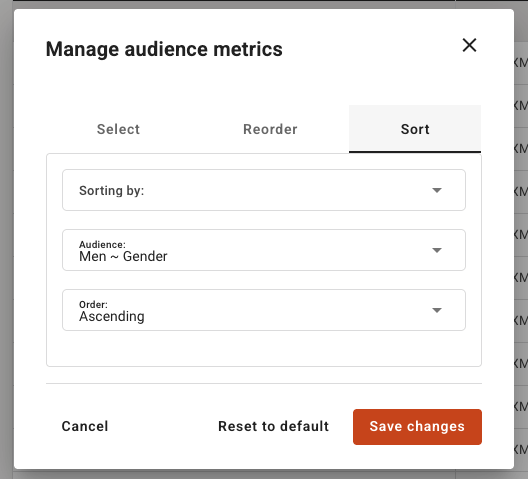
- To sort by a specific audience metrics, select the 3 dots icon next to Media
- Select Manage audience metrics from the drop-down menu
- A pop-up will appear go to the Sort tab
- Select the metric you want to sort by in the drop-down menu
- Select the audience you want to sort by
- Select if you want the data in ascending or descending order
Note: Selecting descending order will rank the media properties by the largest to smallest values - Click Save changes