
Query Building: How to Build Interest and Conversation Based Audiences
Creating an Interest-based Query
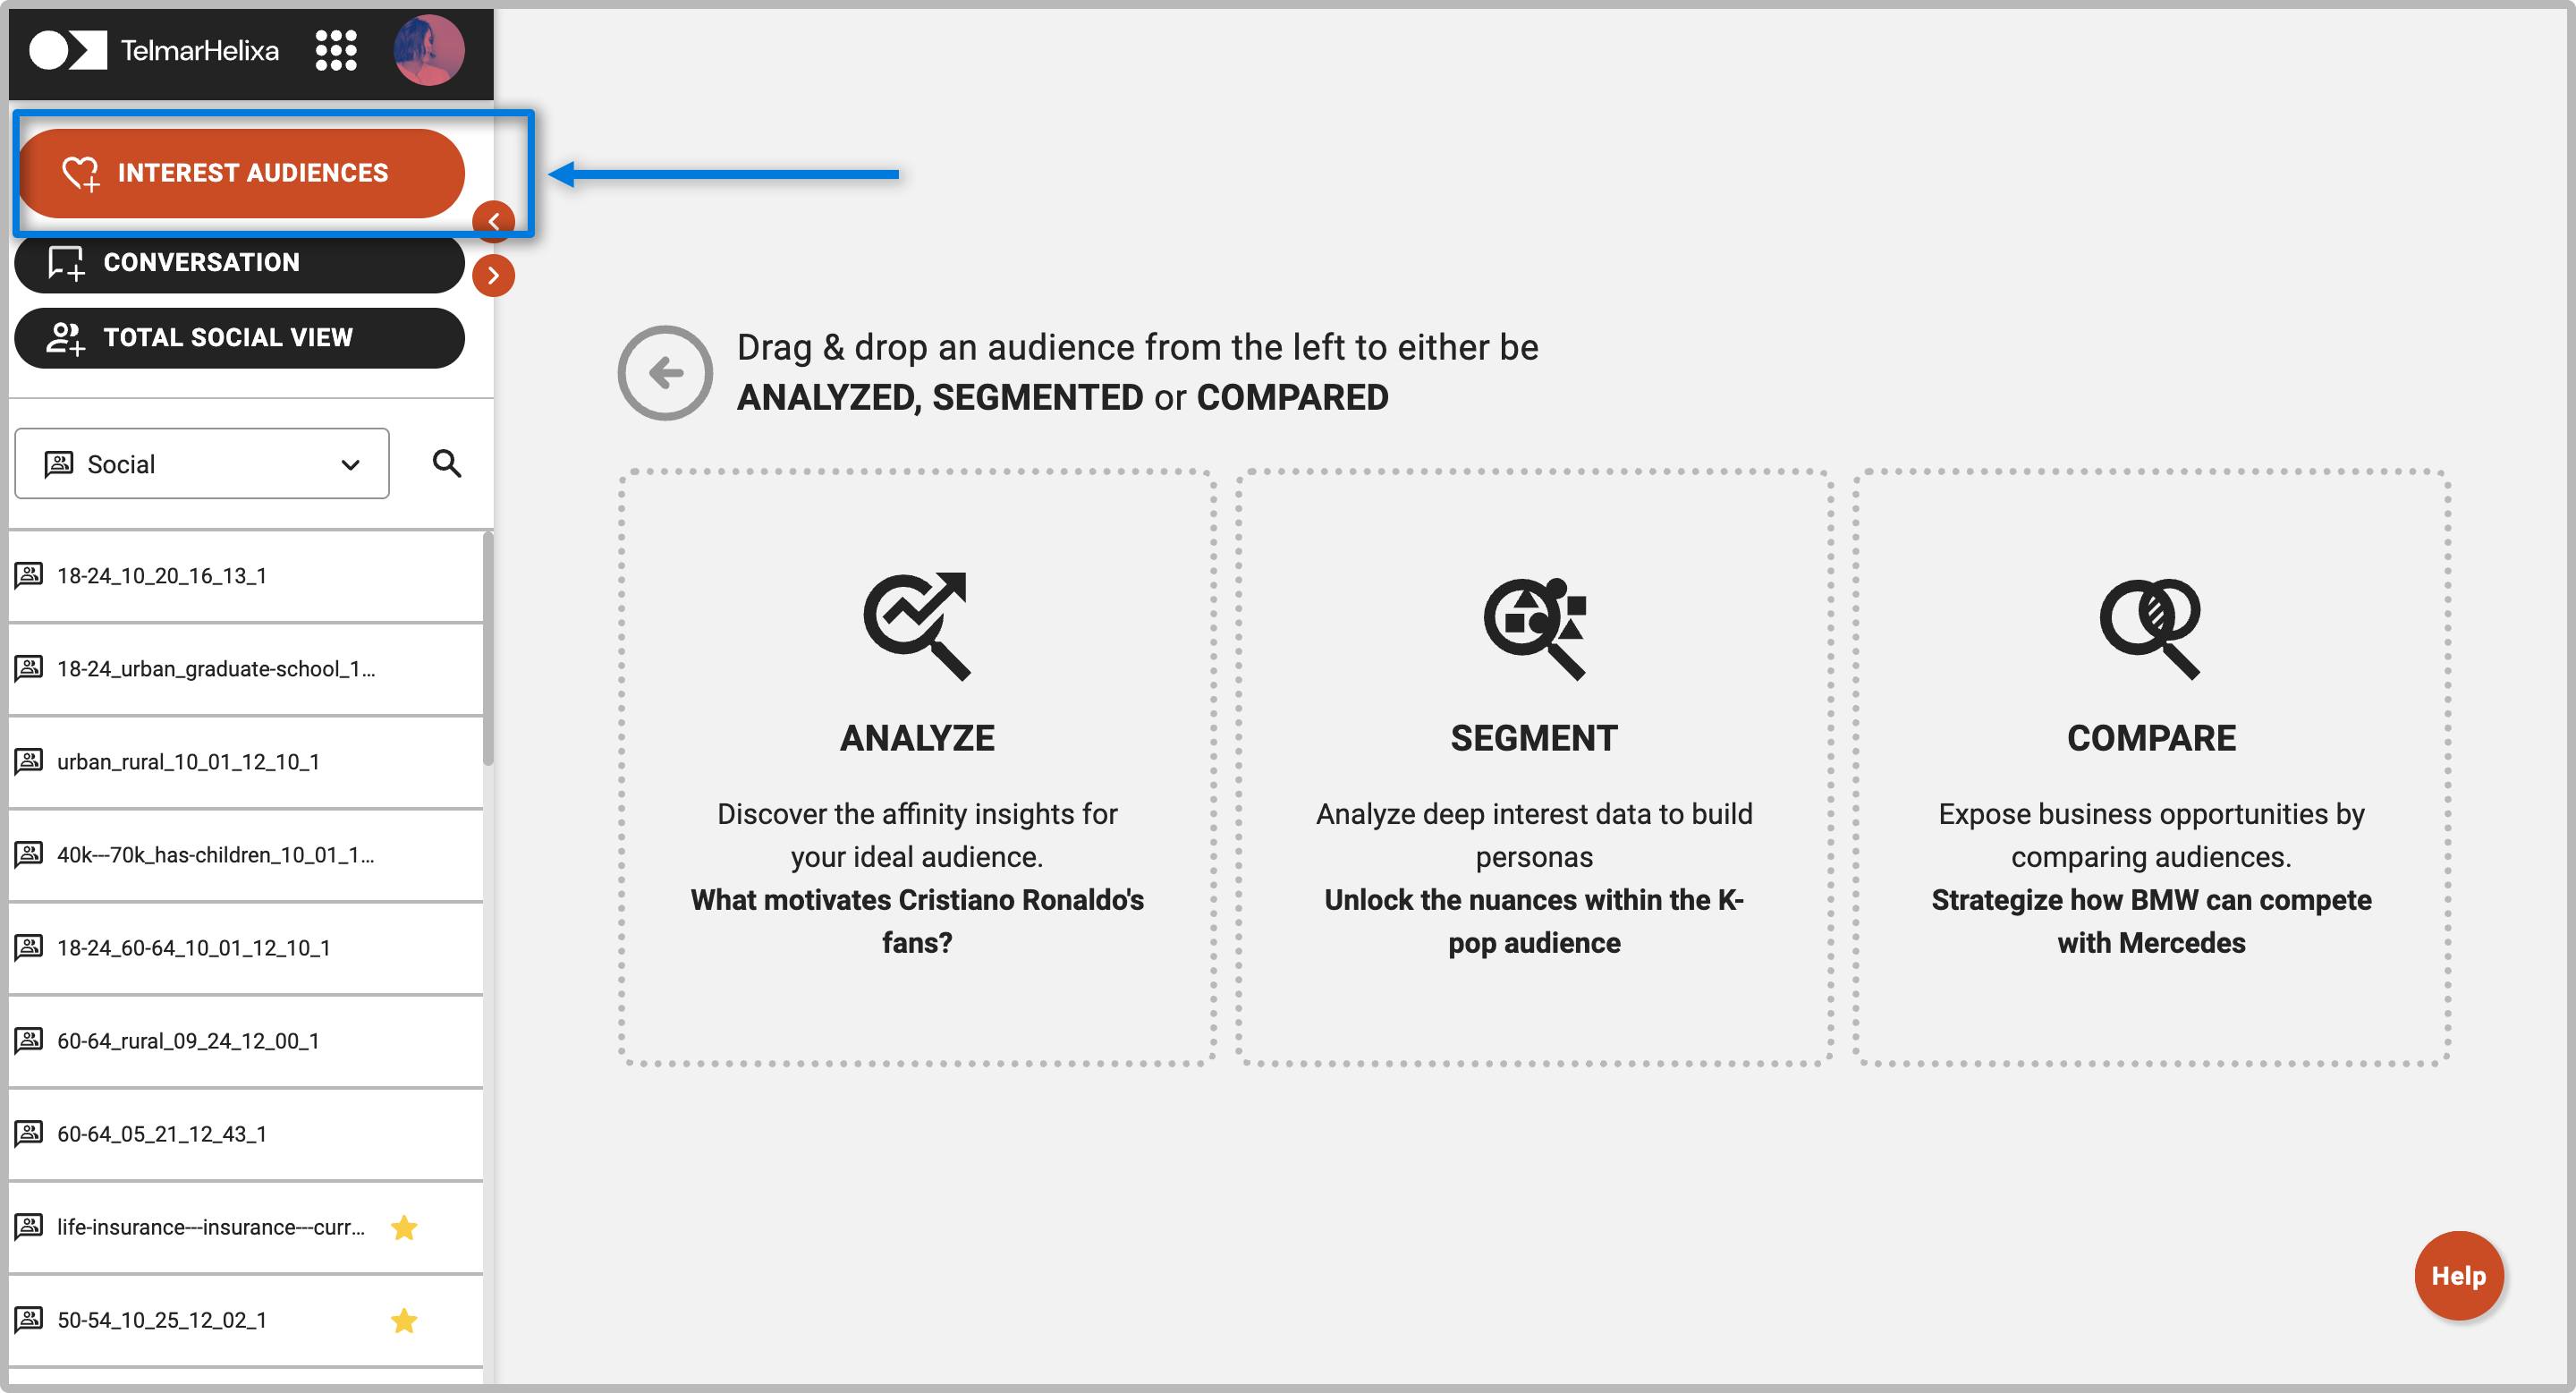
- Log into Discover and click the pink “+ Interest Audience” button in the top left corner of your screen.
- Type the specific brand, media, genre, demographic, or lifestyle you would like to add into the search function and click on the item to add it to your query.
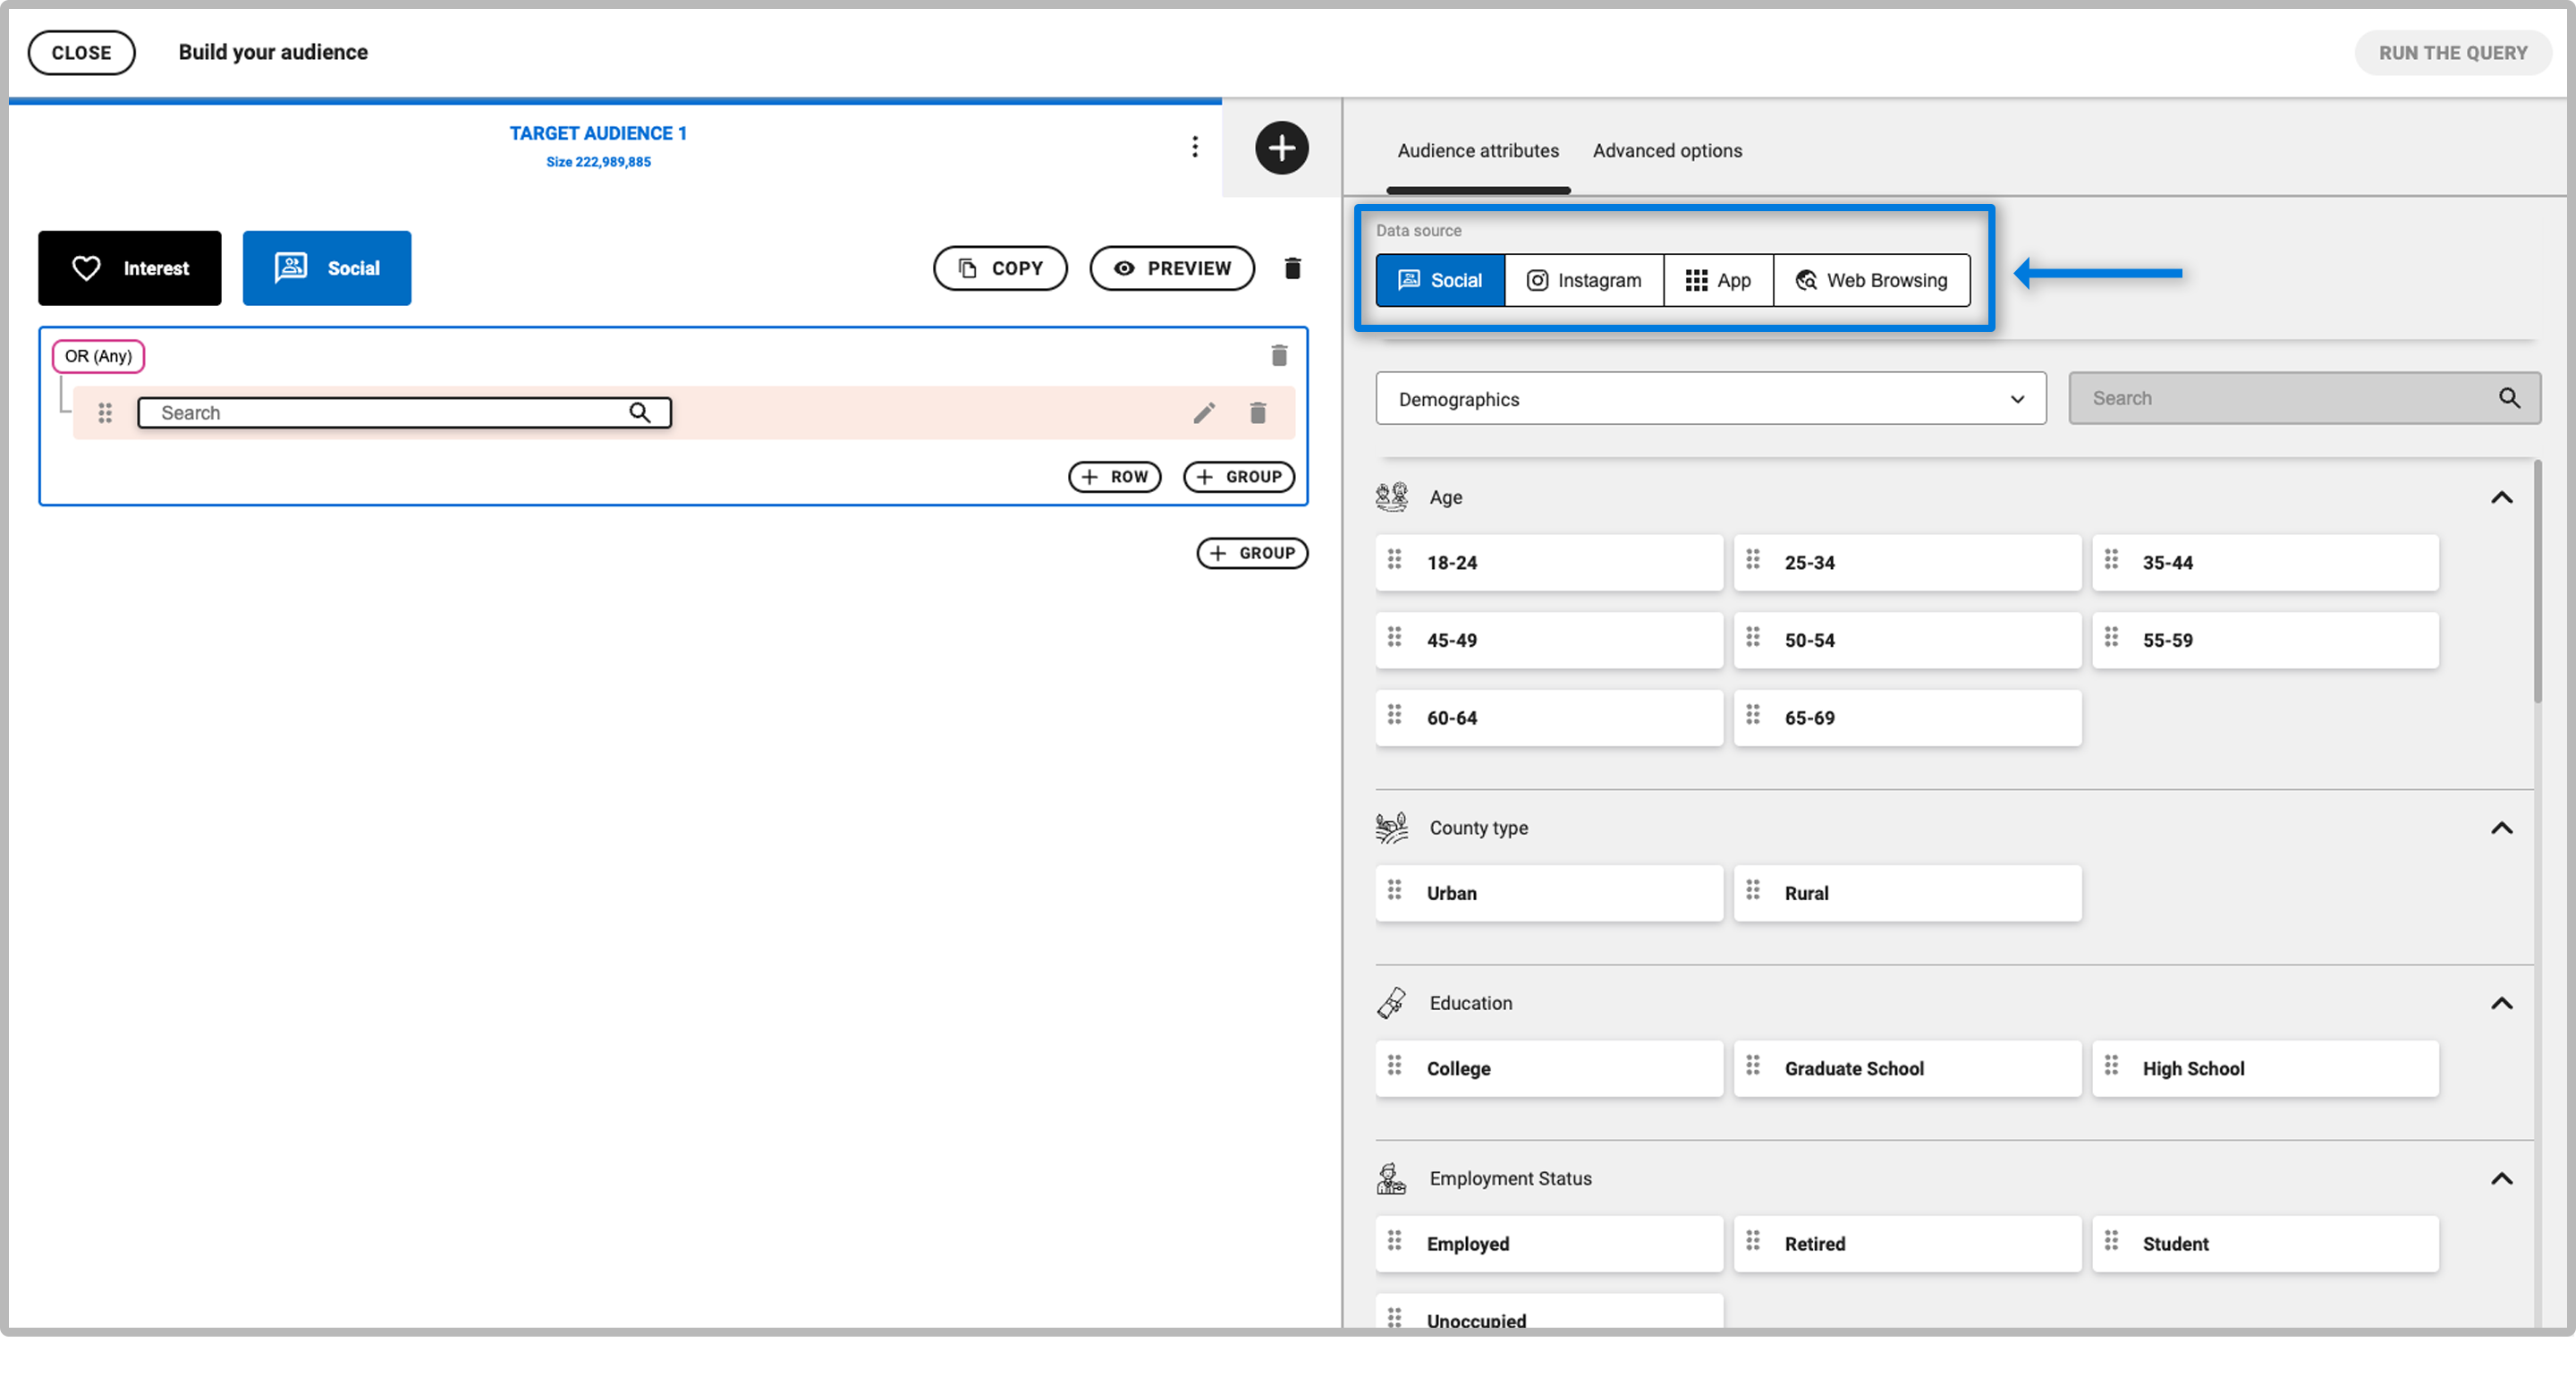
- You can use the right-hand panel to explore categories that are available, and to click or drag and drop demographics into your query. Use the dropdown menu above to filter the available data types and categories.
- The next line will automatically appear, where you can add additional items to your query.
- When you are finished, click the pink “RUN THE QUERY” button, then analyze or segment, to view results.
Selecting Data Stream
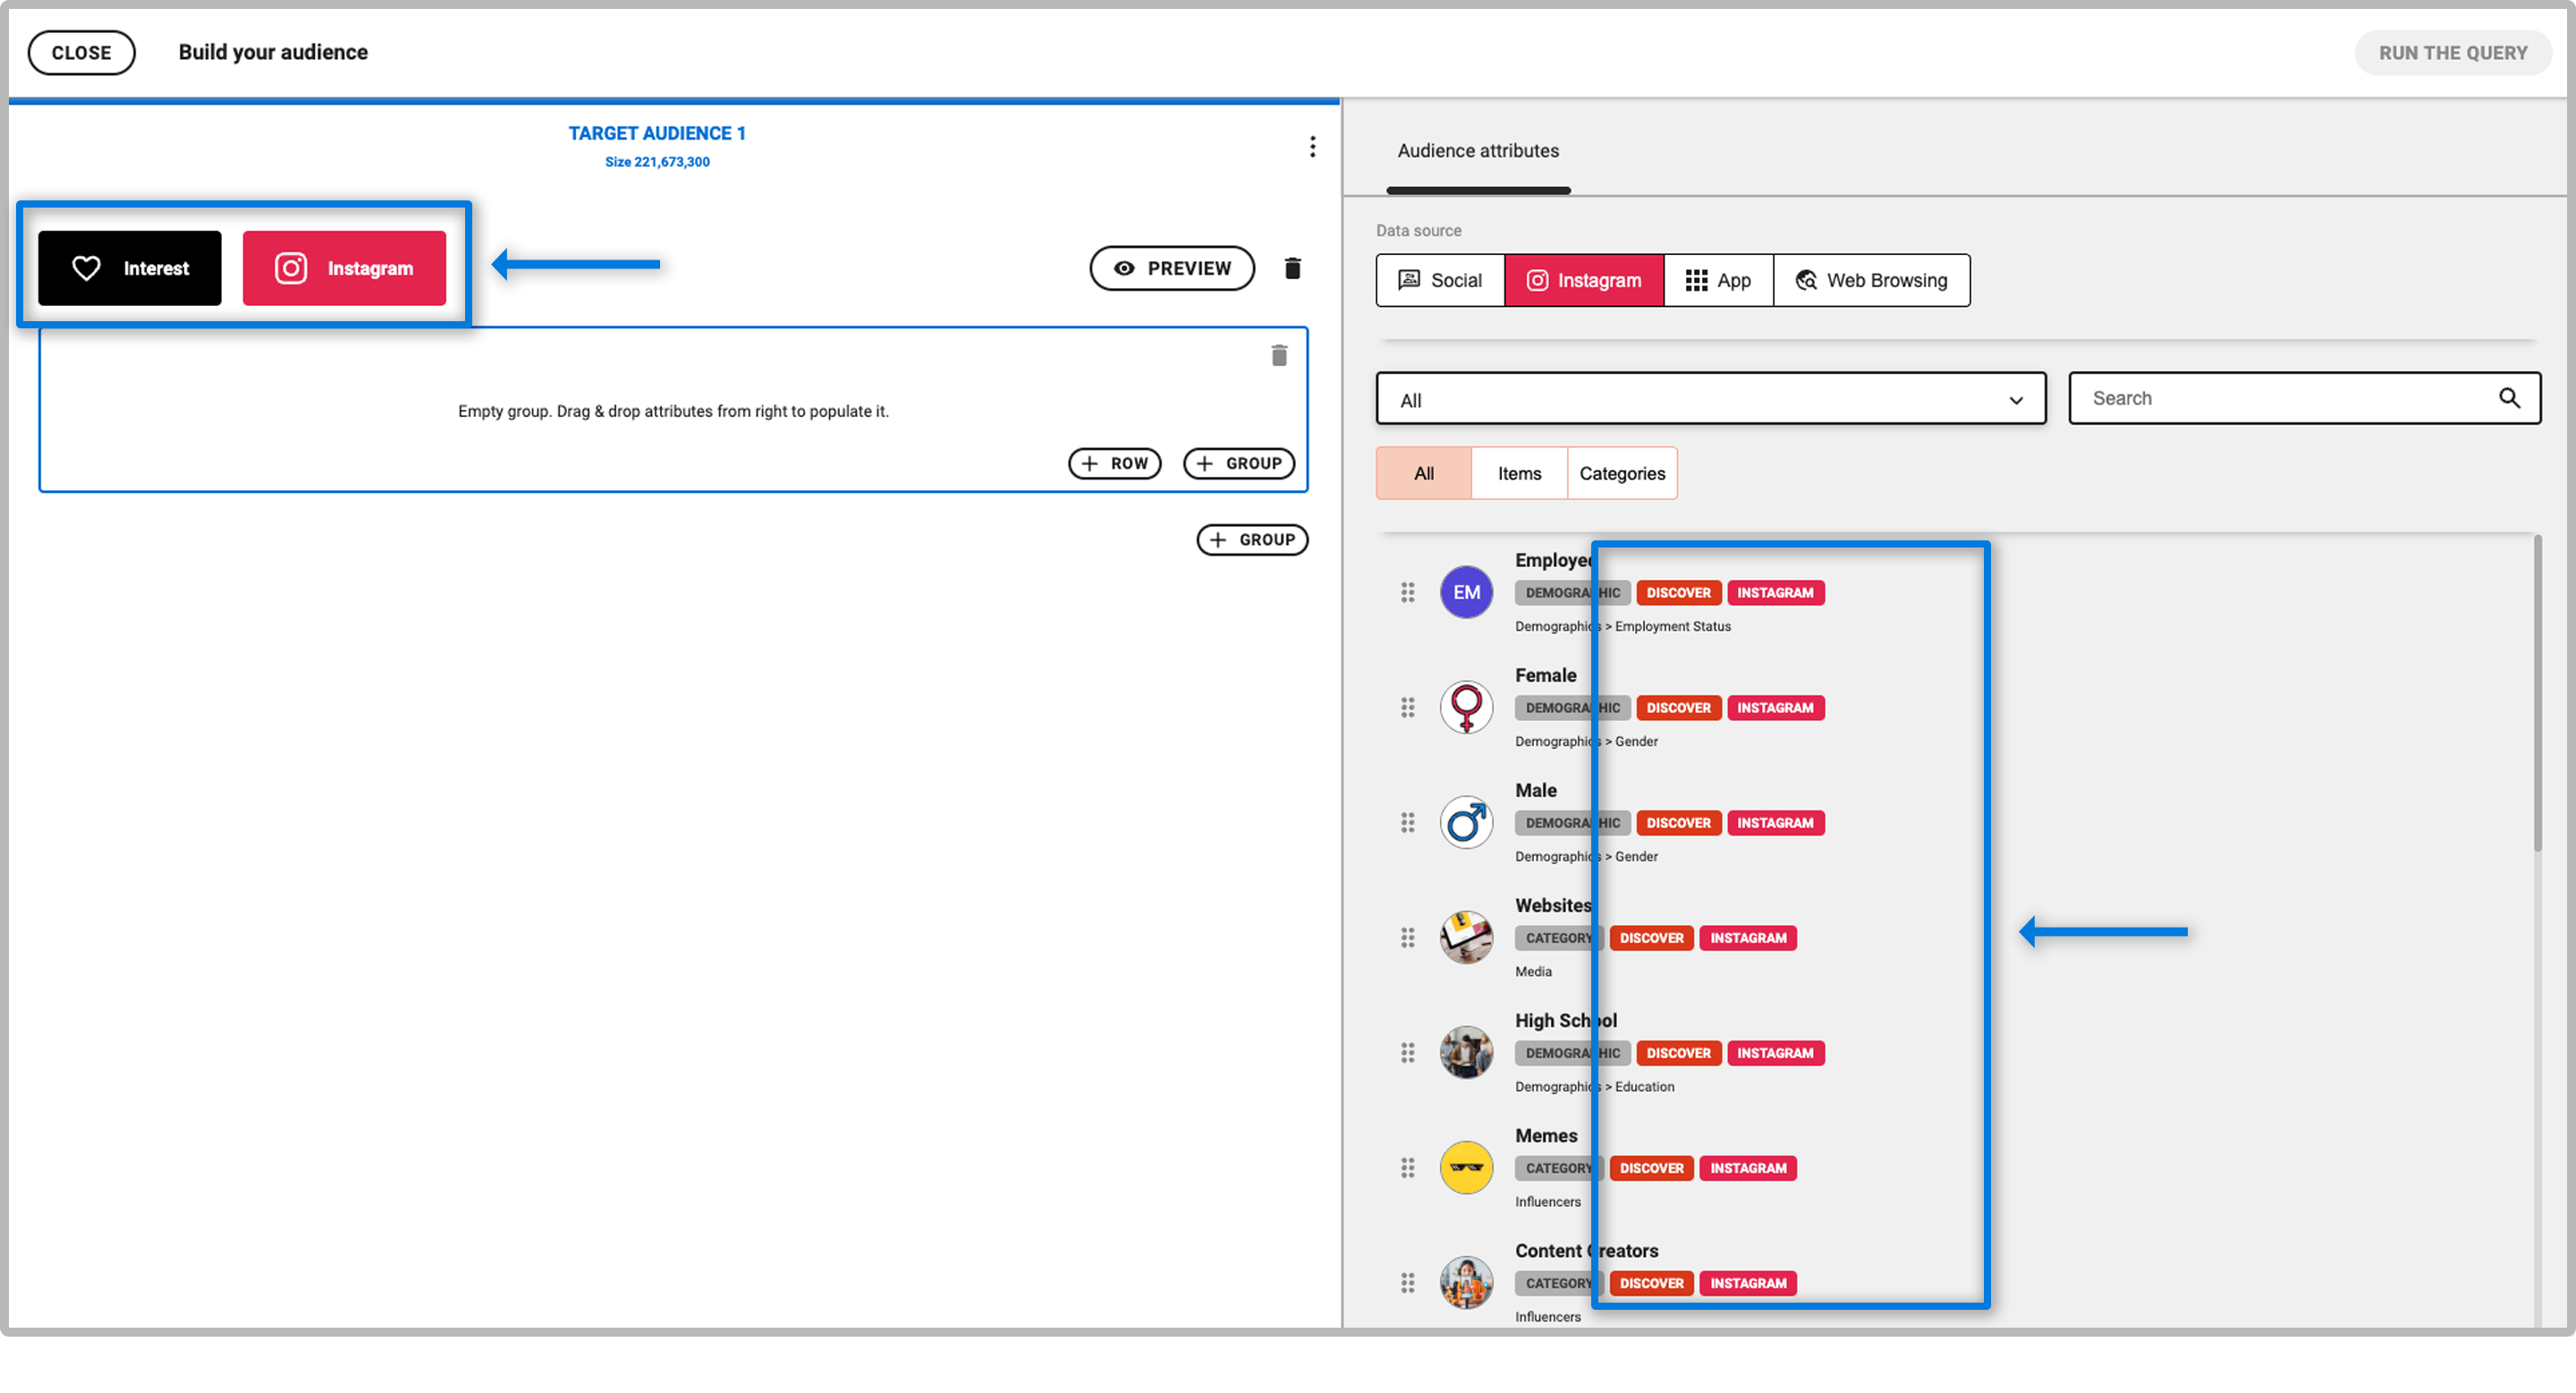
Labels
Utilizing Parenthesis and Boolean Operators
- By default, the main operator will be set to OR. You can switch between OR, AND, AT LEAST, or AND NOT by clicking on the operator.
- To add a new set of parenthesis, click on +GROUP
- To add new items to the query, click on +ROW
- You can also drag and drop items within the query builder, in order to place them into the correct parentheses.
- Once you have built your query, you can check the boolean logic before analyzing by selecting PREVIEW at the top of the screen. This will allow you to confirm the boolean logic and read it in a traditional format.
- When you are finished, click the pink “RUN THE QUERY” button to view results.
OR: The audience will include anyone who matches at least one item in that set of parenthesis.
AND: The audience will include those who match all items in that set of parenthesis.
AND NOT: The audience will exclude those who match items in that set of parenthesis.
AT LEAST: The audience will include those who match at least the number of items you have specified.

Change of Base
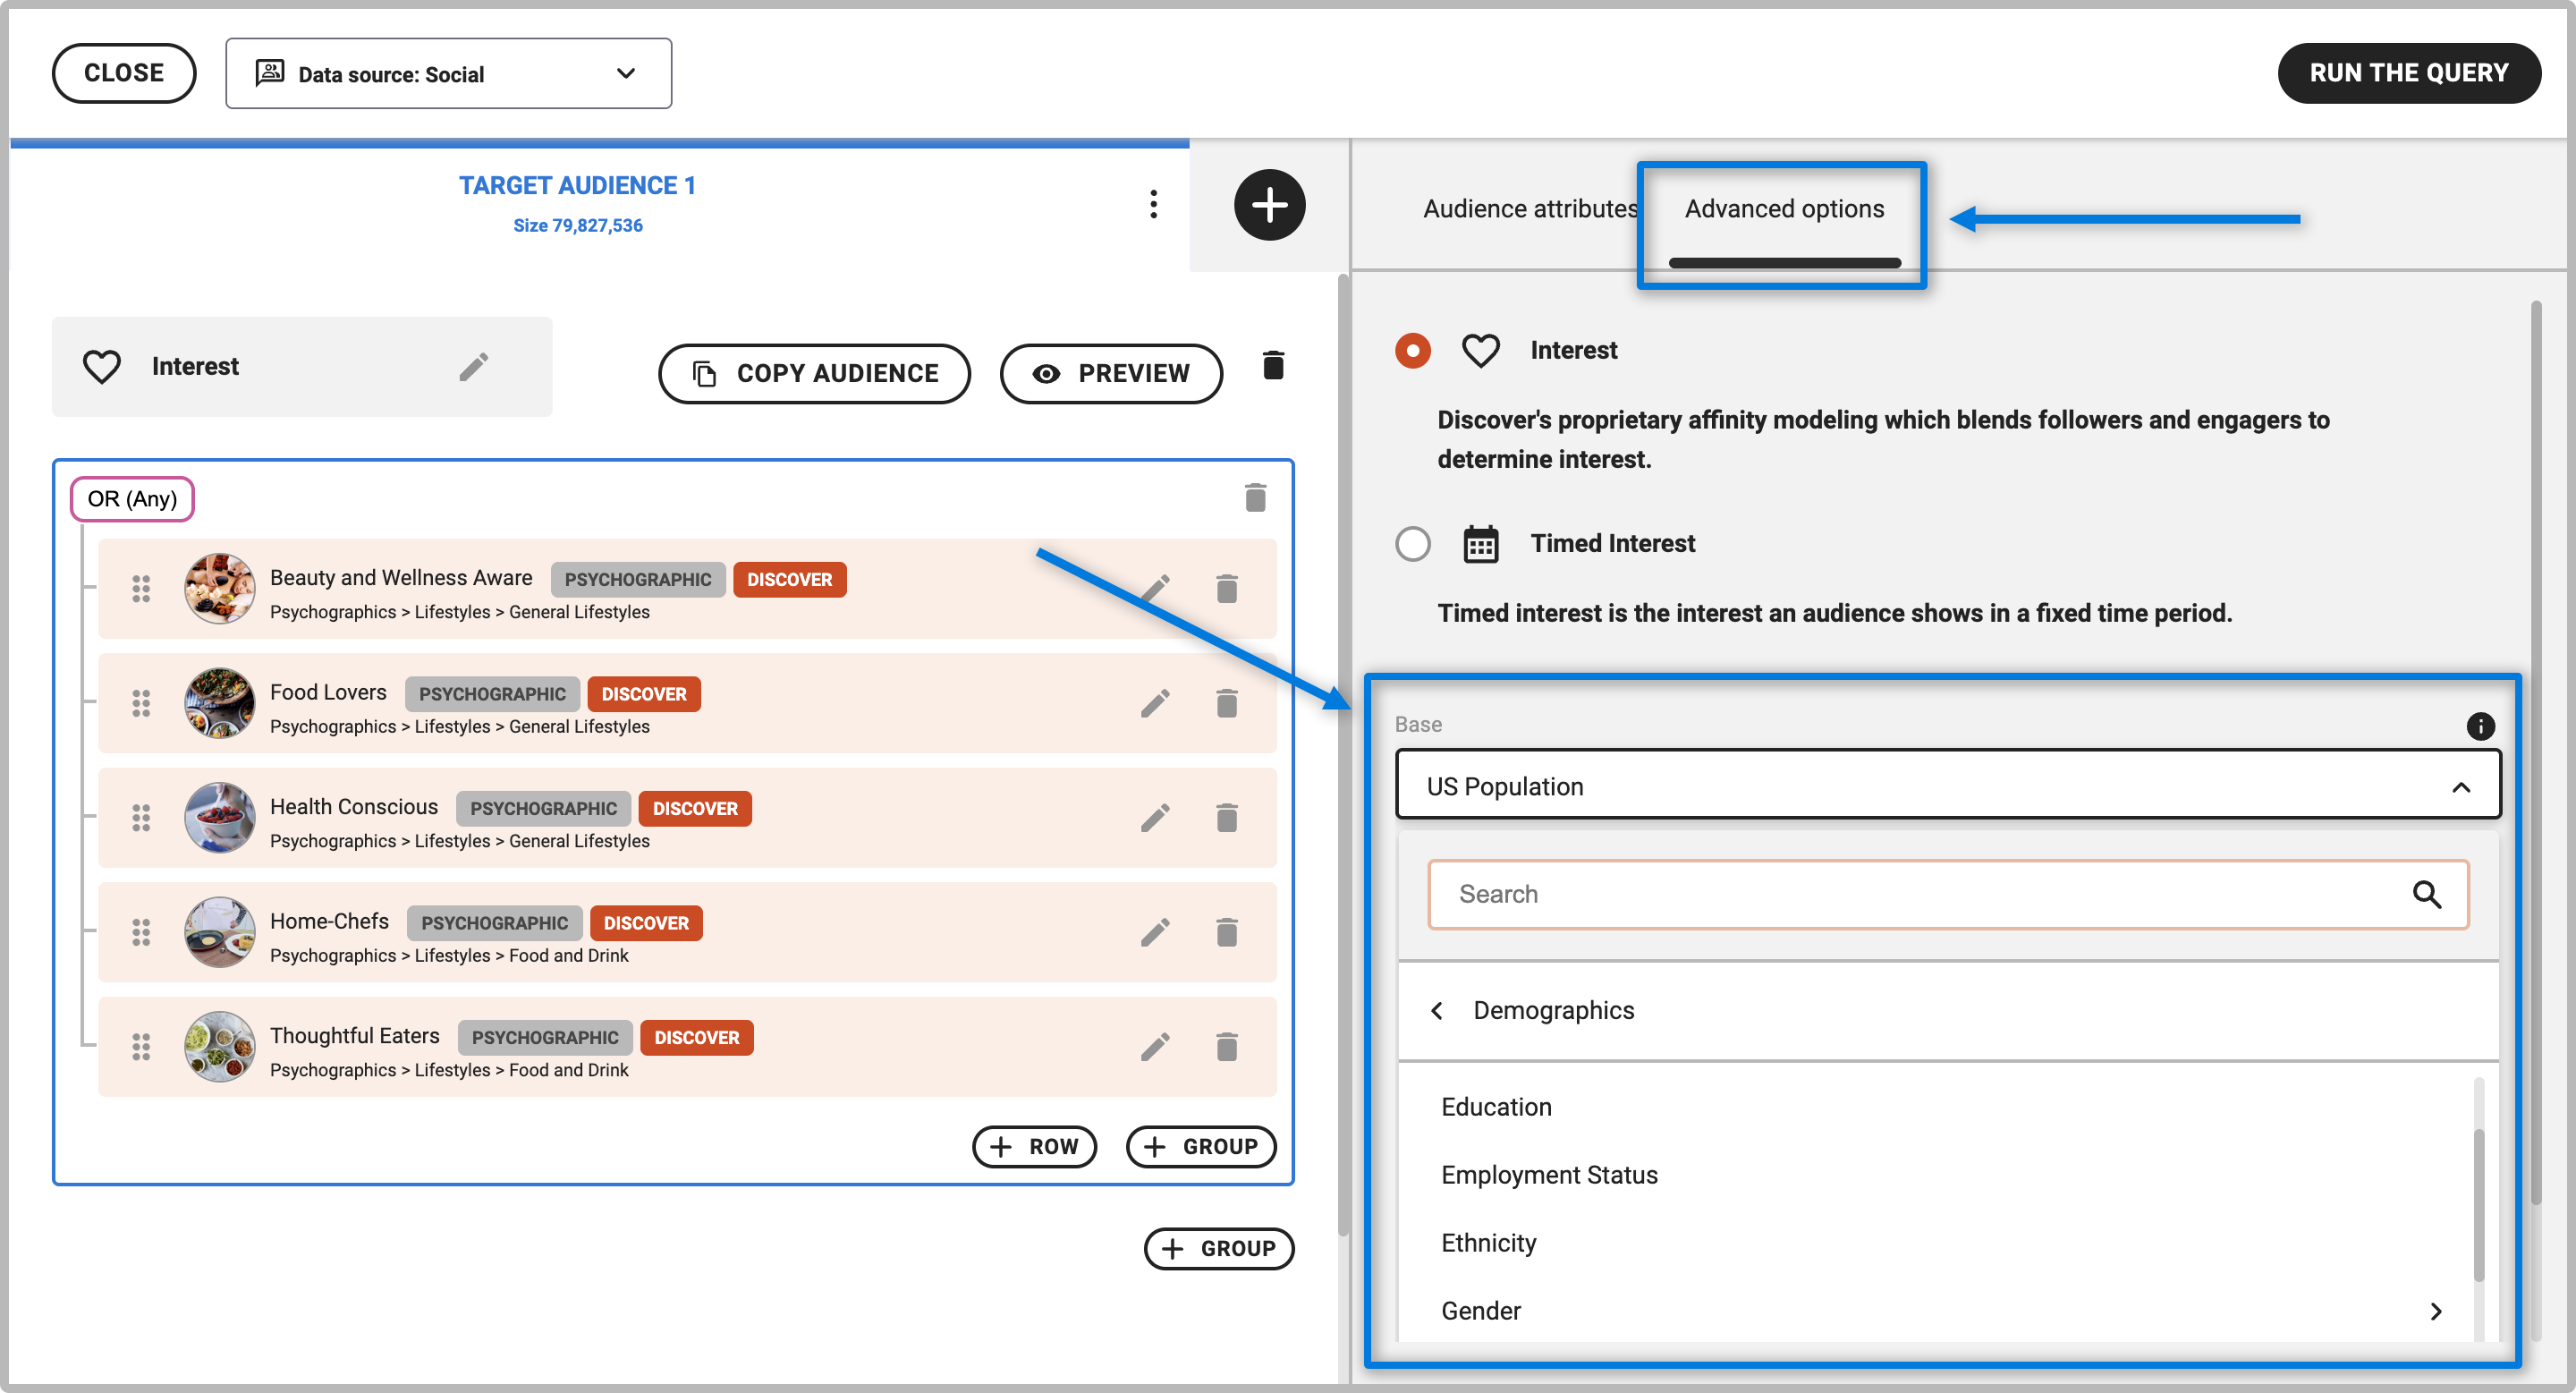
Your base is the audience you are indexing against, and the audience from which your query pulls from. The affinity index will always show how likely your audience is to have a certain trait compared to the selected base population.
By default, your base will be set to the global population for Discover’s Global Affinity, or the general United States population for Discover's High-Res US data.
- To access the change of base, select ADVANCED OPTIONS at the top of your query builder.
- From there, use the dropdown under “Base” to select which base audience you would like the affinity to be indexed against.
- When you are finished, click the pink “RUN THE QUERY” button to view results.
Note: Changing the base will change the overall audience you are pulling from. For example, if you select your base as female, you will only see females in the results even if you do not add female to your query.
Changing Time Frames
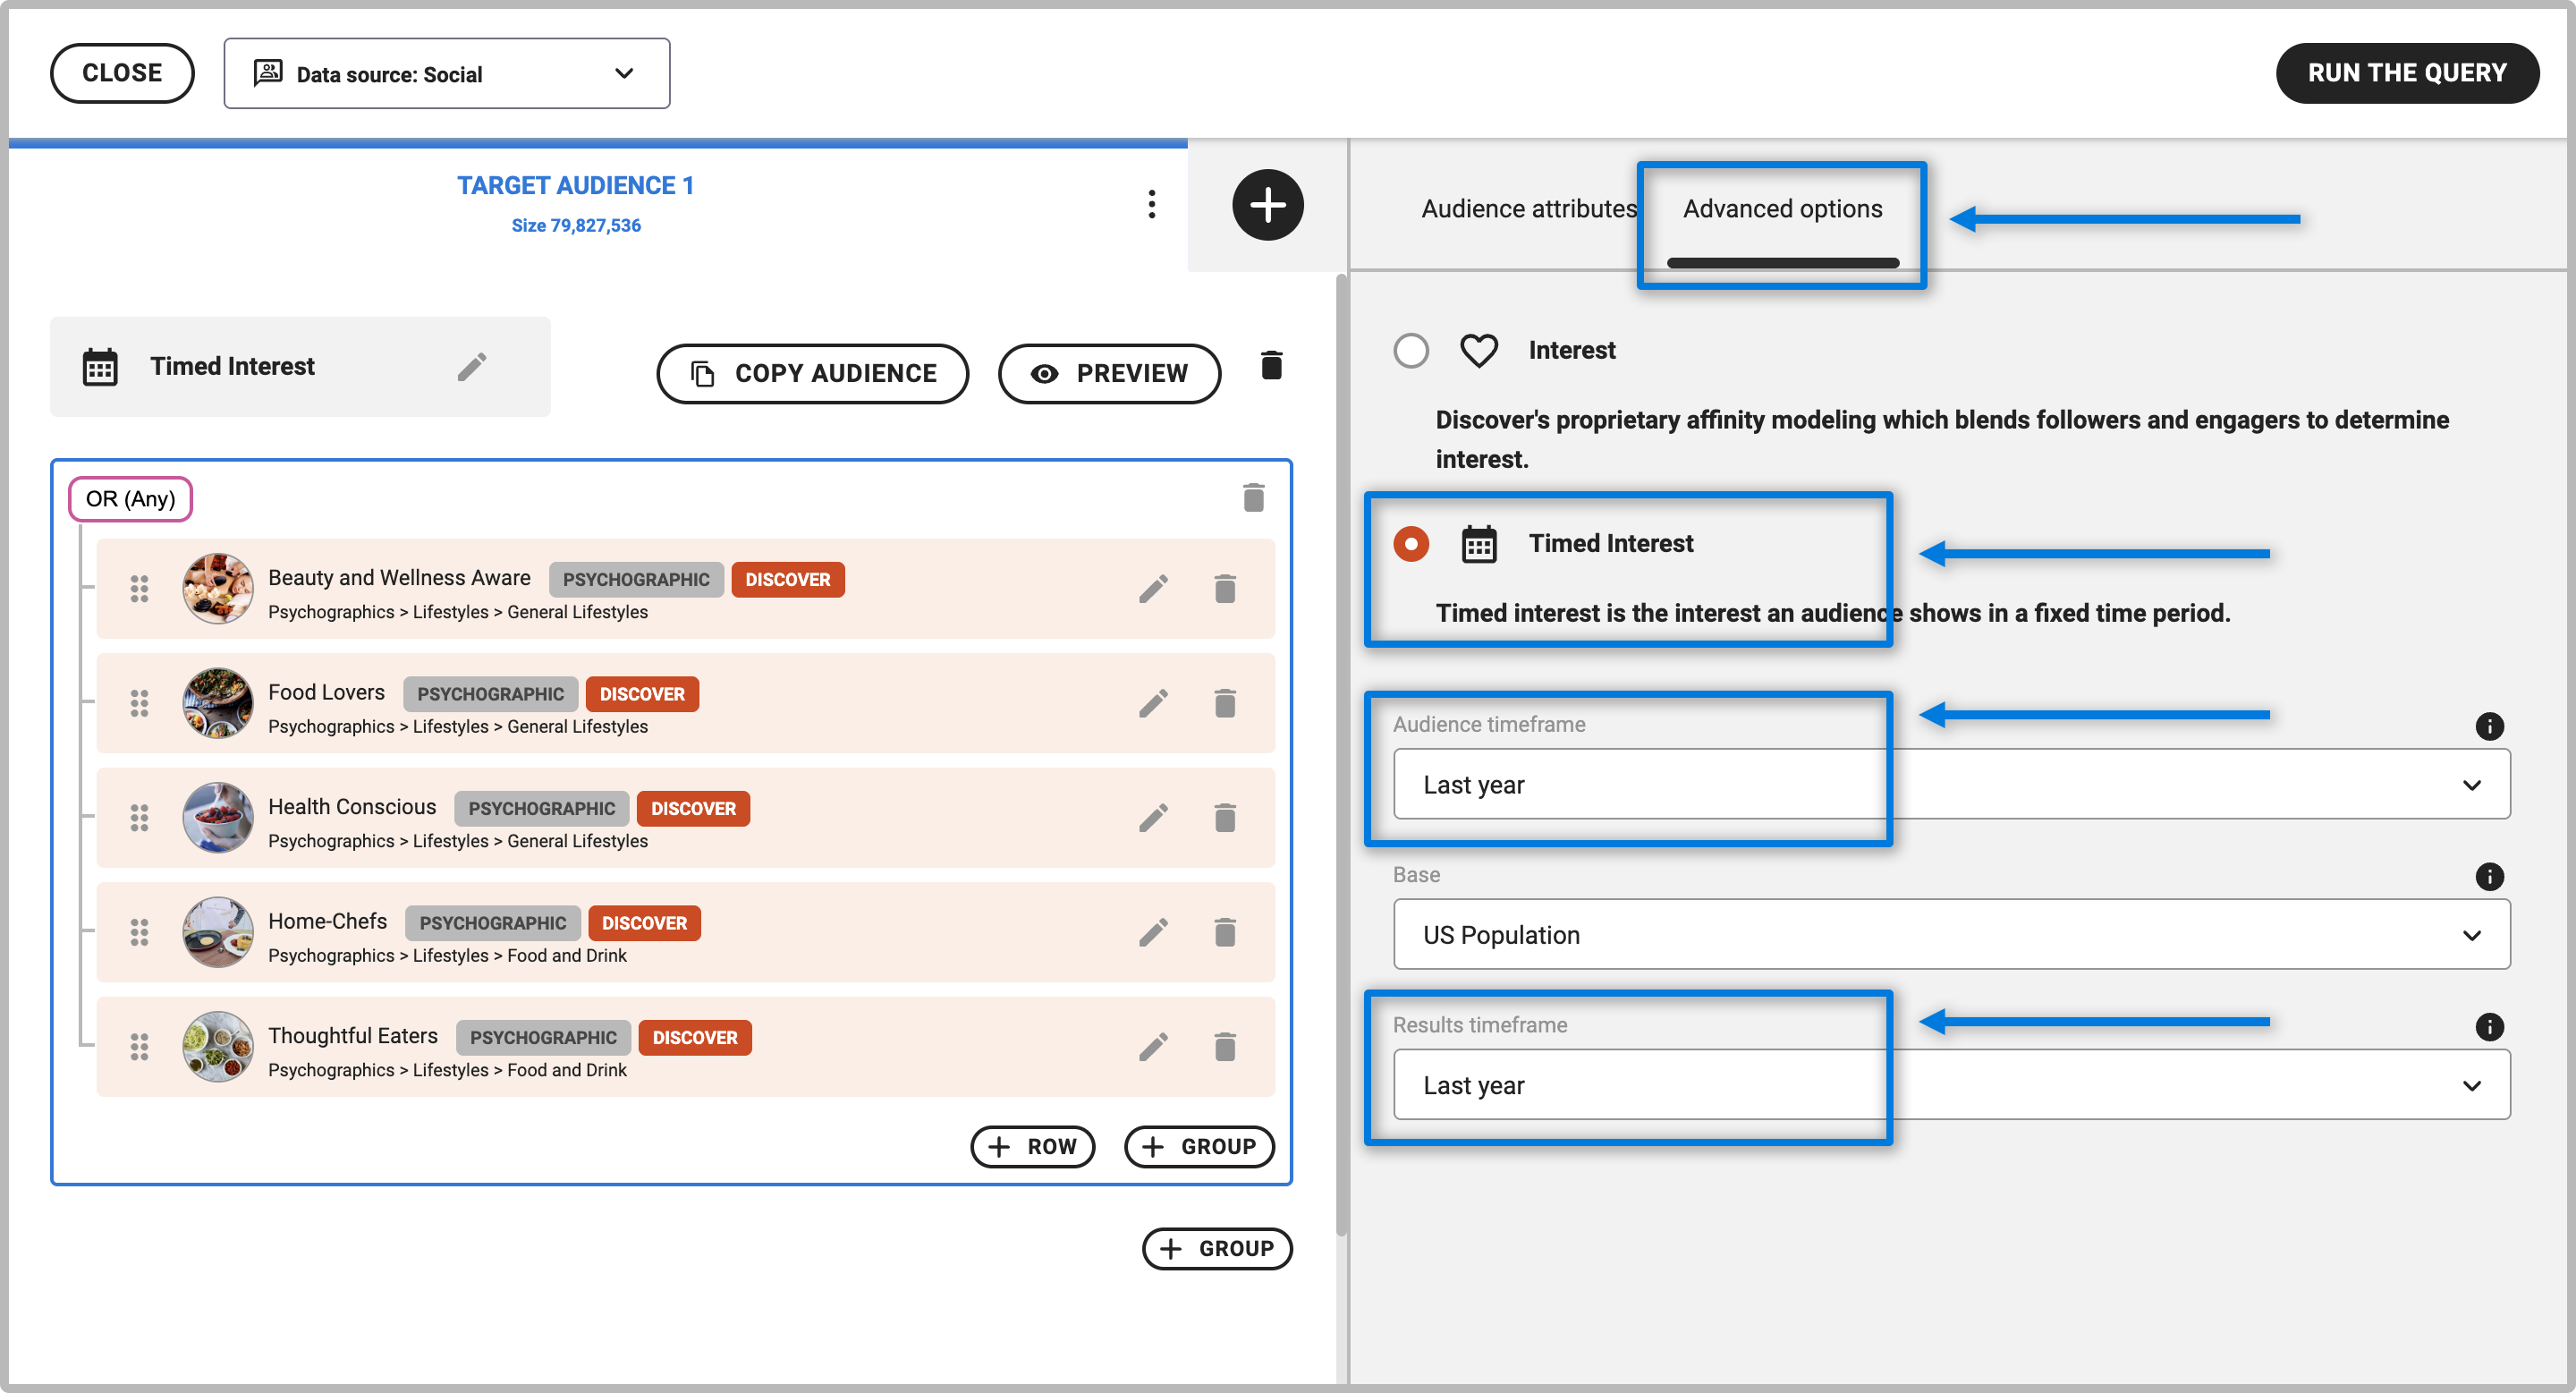
- To access custom time frames, select ADVANCED OPTIONS at the top of your query builder.
- Switch from Interest to Timed Interest, which allows you to change the base and utilize custom timeframes.
- You will see two options for custom time frames– Audience Time Frame and Results Time Frame:
Audience Timeframe: This timeframe indicates what timeframe we should look at to choose who is part of the Target Query.
For example, if you have “Nike” as part of your query, and set the Audience Timeframe to December 2020, we would only include those who were engaging with Nike during the month of December 2020.
Results Timeframe: This timeframe indicates what timeframe we should look at when reporting interests and affinities.
For example, if you change the results Timeframe to All 2021, the interests, lifestyles, and affinities reported will be based on your audience’s interactions between Jan - Dec 2021.
- Use the dropdown menus under “Audience Timeframe” and “Results Timeframe” to customize which timeframes you would like to use for your audience and results. By default, both the Audience and Results timeframes are set to the last two years on a rolling basis (last 730 days).
- When you are finished, click the pink “RUN THE QUERY” button to view results.
Conversation-Based Audience Selection
- Log into Discover and click the blue “+ Conversation” button in the top left corner of your screen.

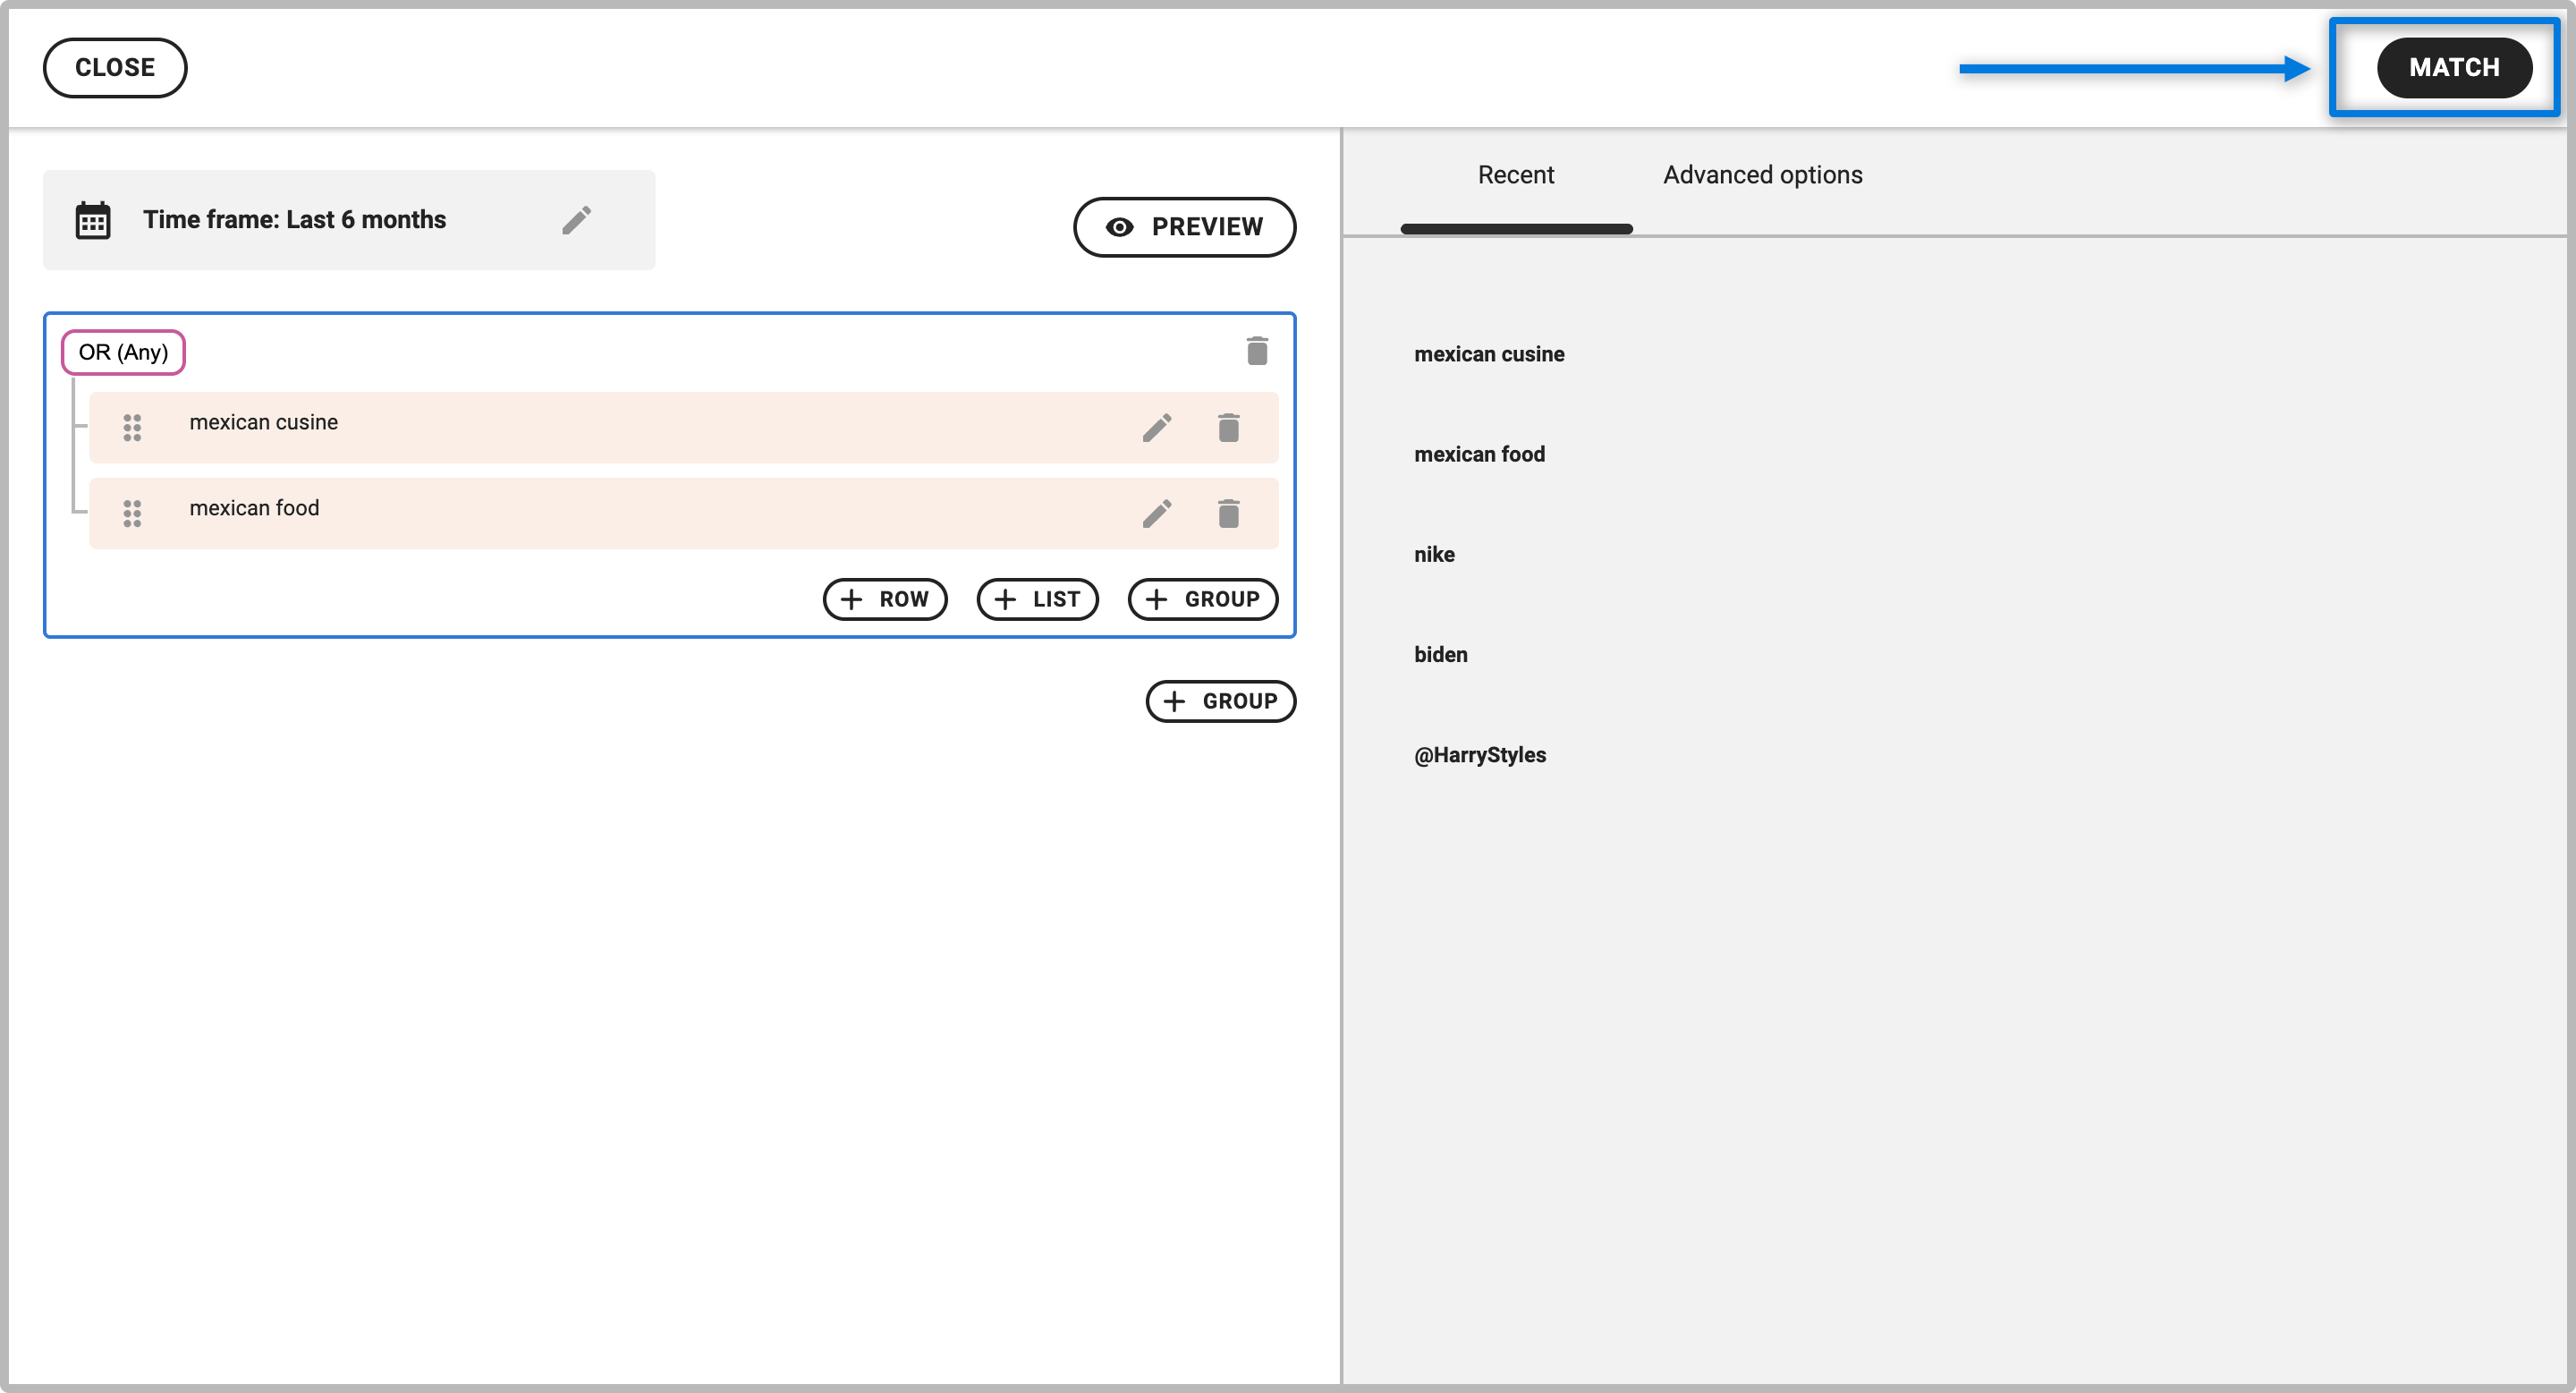
- Type the specific keyword, Twitter handle, hashtag, or topic you would like to add into the search function and hit the enter/return key on your keyword to add it to your query. You can also use the right-hand panel to add in recent conversation-based queries.
- Keep in mind that you are selecting an audience who has posted or Tweeted these keywords in their own content, NOT those who have engaged with these topics.
- The next line will automatically appear, where you can add additional items to your query. Create each individual keyword, phrase, hashtag, or handle as it’s own row in the query builder.
- Utilize the Boolean Operators to create more complex queries.
- Select “advanced options” to choose the Audience Timeframe you would like to use. This indicates what time period we should look at to choose who is part of the Target Query. By default, Conversation audience timeframe is set to the last 6 months.
- Select the pink “MATCH” button to begin the audience creation and matching process.
- Once your audience has finished matching, you can drag and drop it into the “Analyze” section from the left-hand side of the screen to view results. You will know the audience is finished matching by the green dot next to your query.
