
What is DataLoader?
What is DataLoader?
All content in this document is confidential
- DataLoader is a platform that enables clients to upload their surveys for use in Telmar’s Insights Solution (SurveyTime/Explore)
- Users have full control over the structure of the codebook
- Proprietary data can then be accessed, viewed and anayzed in SurveyTime/Explore within minutes.
- DataLoader currently supports SPSS file (.sav)
What do you need to get started?
- An account and login details to access DataLoader.
- An SPSS file. The SPSS FILE requirements can be found in the application itself by clicking on the question mark on the top right hand side of the screen . The maximum SAV file size that is supported is 2GB. Contact your Client Success team for access to the SPSS file guidelines
The data loading process
The data loading process consists of the following steps:
- Uploading the SPSS file
- Building a codebook
- Defining the settings, i.e. weights, population unit and base filters
- Once a user has completed these steps and building the codebook structure, the data can be uploaded and used in Telmar’s Insights Solution, SurveyTime/Explore.
Accessing DataLoader
DataLoader is accessible via the Telmar Platform:
https://platform.telmar.com/login. Click on DataLoader to launch the application
1. How to upload your data
Uploading your file
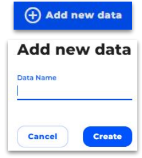
- On the Home screen, click on the Add new data button
- Name the survey as you want it to appear in SurveyTime/Explore
- Browse or drag and drop your sav file onto the File upload screen area
- Using the Region drop down, select your SurveyTime/Explore region
- Then click on the Create upload button
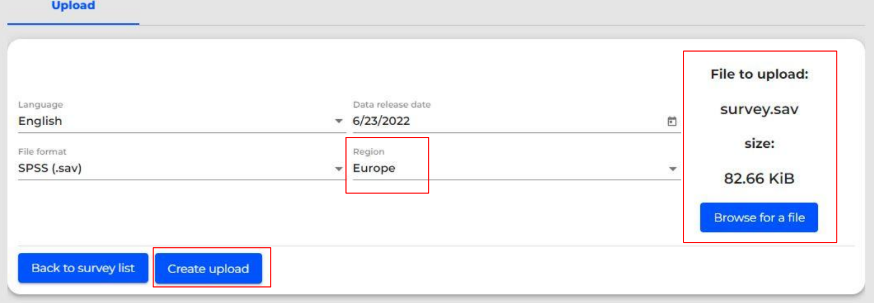
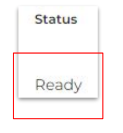
- Data cleaning and conversion is now in progress (this may take a few minutes depending on file size).
- When this is done, the dataset will appear in the Dataloader Dashboard as Ready.
- Note: the maximum file size DataLoader can handle is 2 GB (2000 MB).
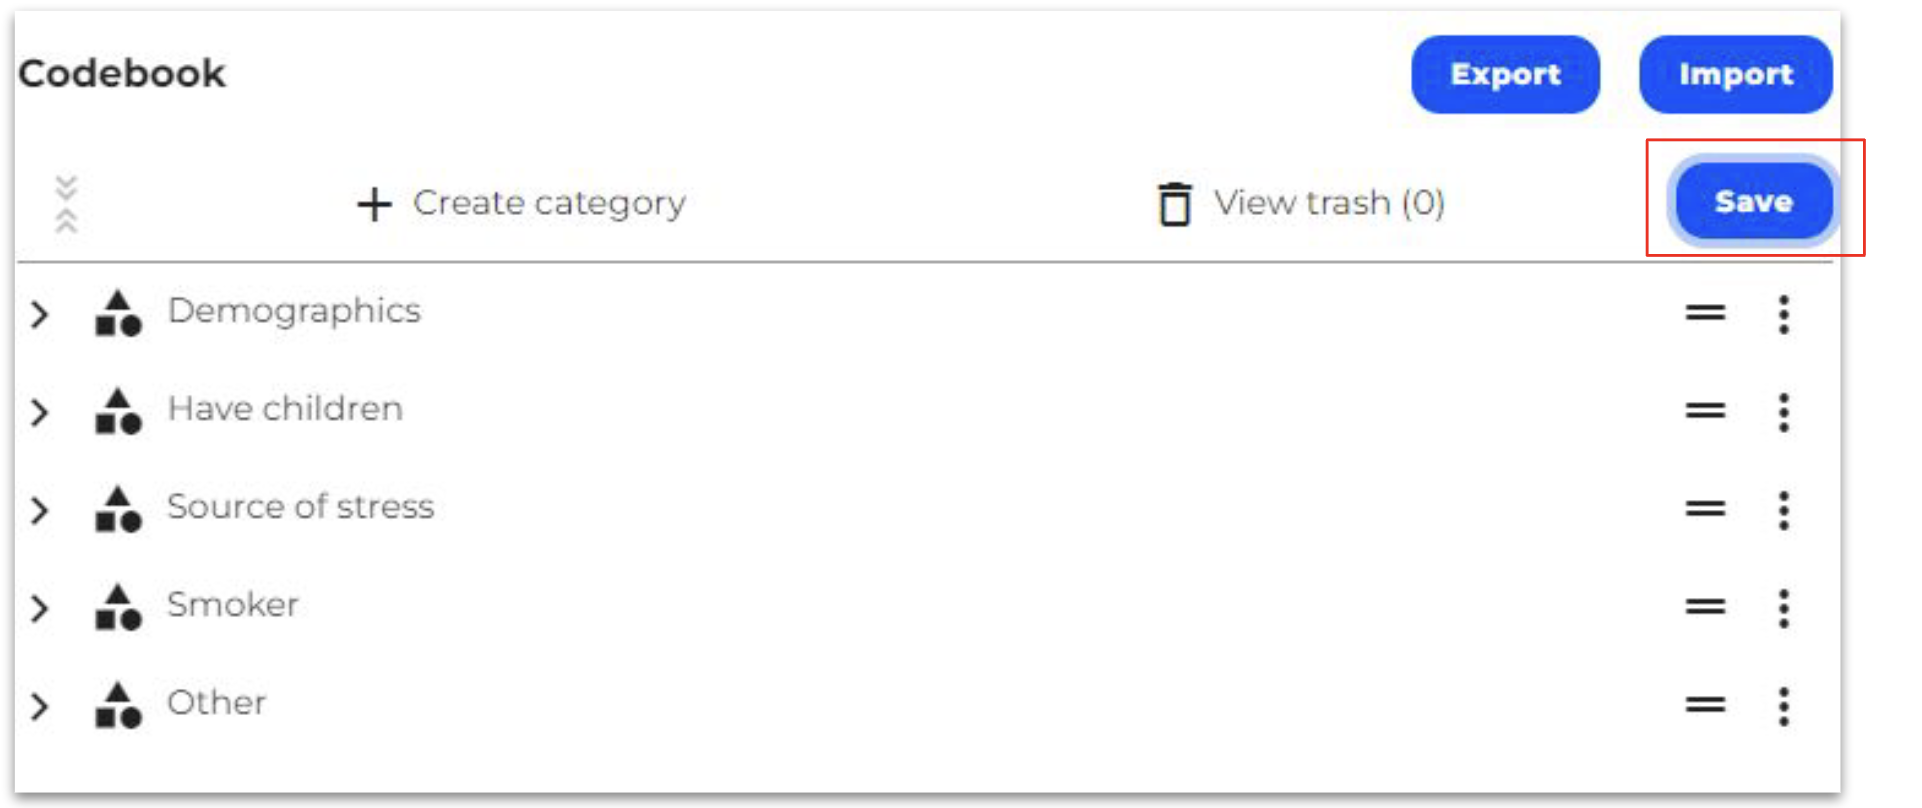
2. Building the codebook
The DataLoader user interface has a powerful and intuitive codebook editor allowing users to customize and edit the codebook.
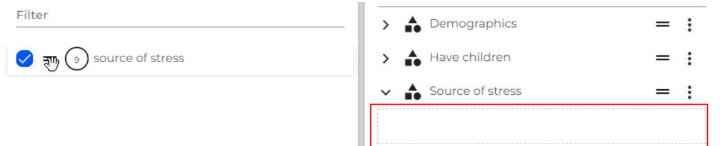
- The survey questions that appear in the left-side panel are unassigned when the data is first uploaded.
- For each question, the number of answers are shown in the circle
- As the codebook is built, edits are done on the right hand side panel.
- The main functionalities are:

2.1. Codebook Editing Functions
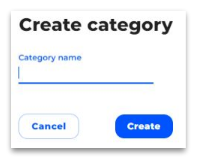
Creating categories and sub-categories
- Group questions under a Category/Sub-Category
- Select the questions from the left hand side of the screen by ticking the box next to the question and then dragging them onto the right hand side of the screen under the category that has just been created.
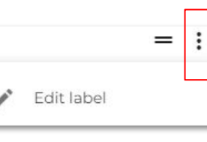
Editing questions and answers
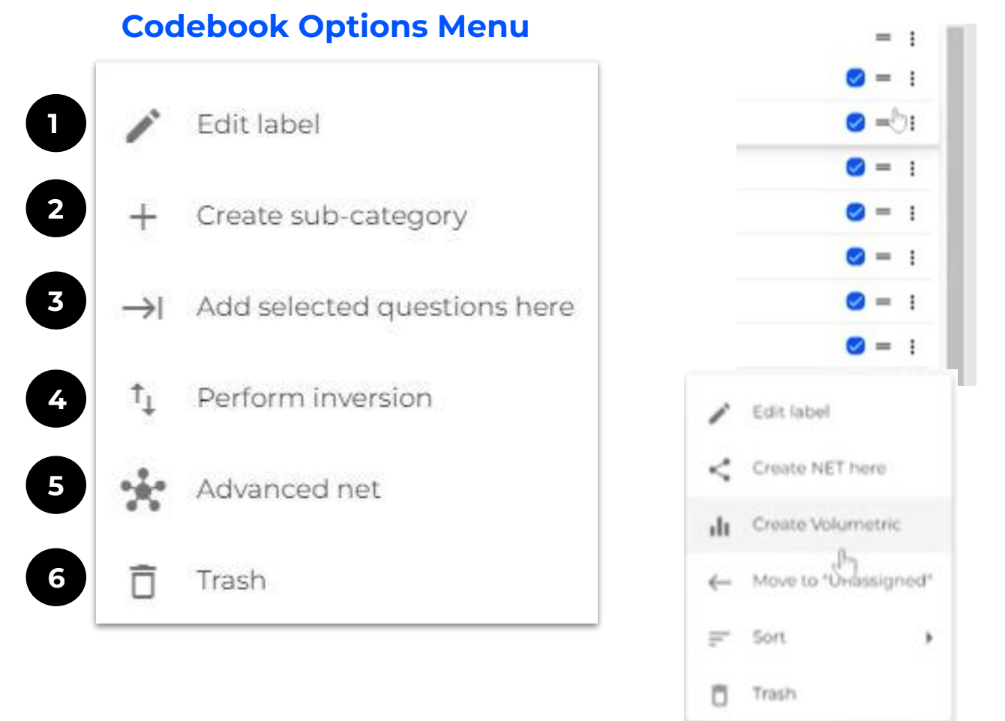
- Click on the three dots and select Edit Label
- You can now rename the label
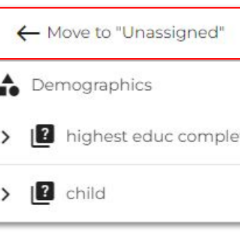
Unassigning questions
- If you want to move questions back to the right hand side of the screen, select the question, click on the three dots and select Move to “Unassigned” to move the question to the left panel
Deleting questions
- Questions that are not required or not relevant can also be moved to Trash and will be displayed in the trash icon.
- These can be restored if needed.
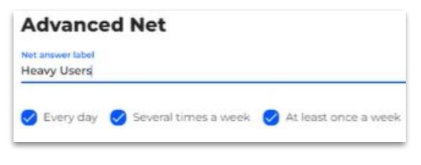
Creating Net responses
- Combine multiple answers with OR (e.g. Men OR Women).
- Select the answers you want to group, click on the three dots and select Create NET here:

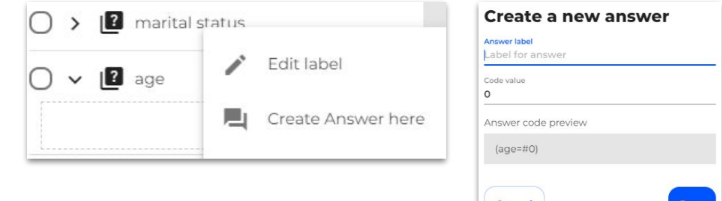
Creating answers
- Create answers for questions that have a value equal to the sum of respondents (commonly Age, Gender or income scores).
e.g. Aged 18 (AGE=#18), Aged 19 (AGE=#19) etc.
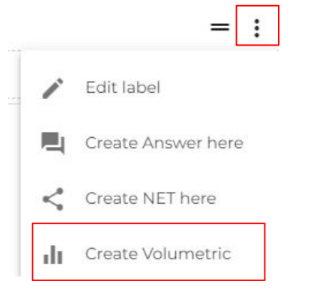
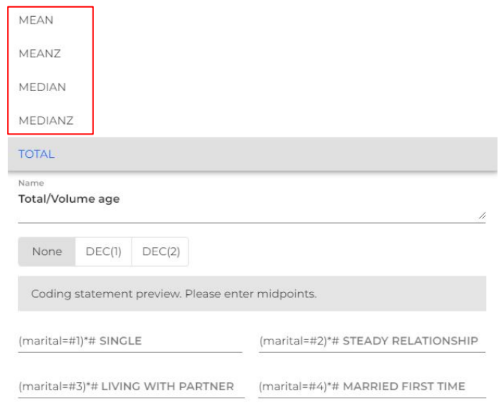
Creating volumetrics
- Create Total and Averages (Total, Mean, Meanz, Median, Medianz) and specify decimals for a range of questions.
- Select the answers that you want to include in the volumetric coding.
- Click on the three dots to select the Create Volumetric option.
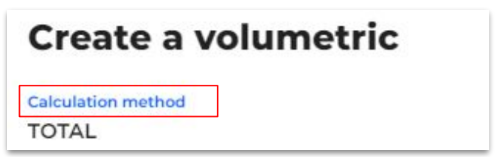
- Click on the word Total which appears under the text, Calculation method and select the type of Volumetrics calculation you want to use.
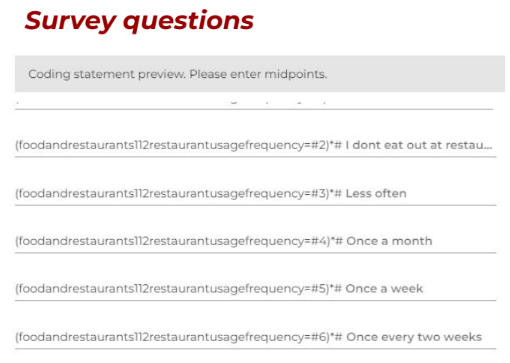
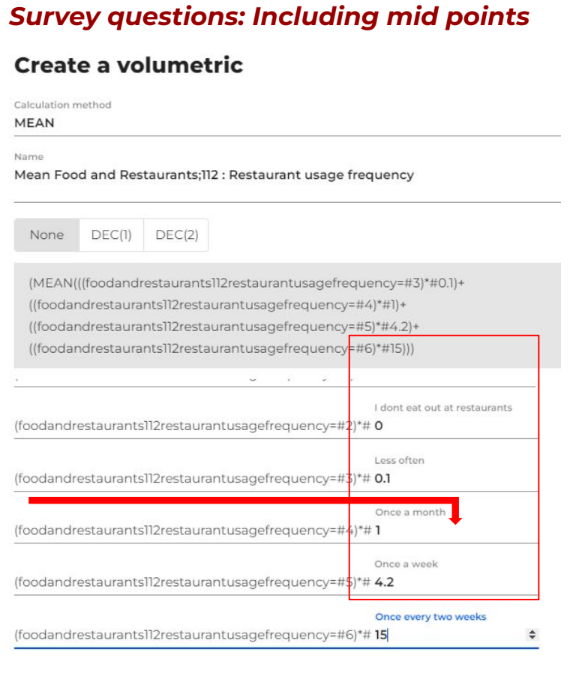
Creating volumetrics example 1
- Once you have selected the type of Volumetric coding you want to use, you will need to enter the midpoints for the answers.
- Here is an example of mid points for Fast Food frequency:

Creating volumetrics example 2
Here is another example of Volumetric coding for Household Income
Survey questions
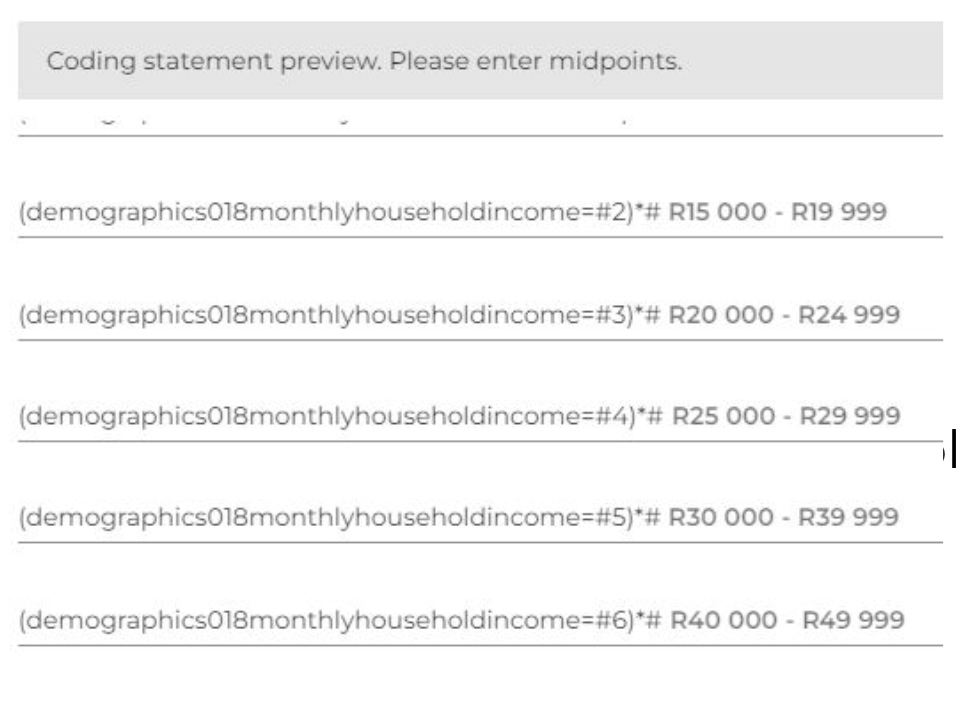
Survey questions: Including inc. mid points
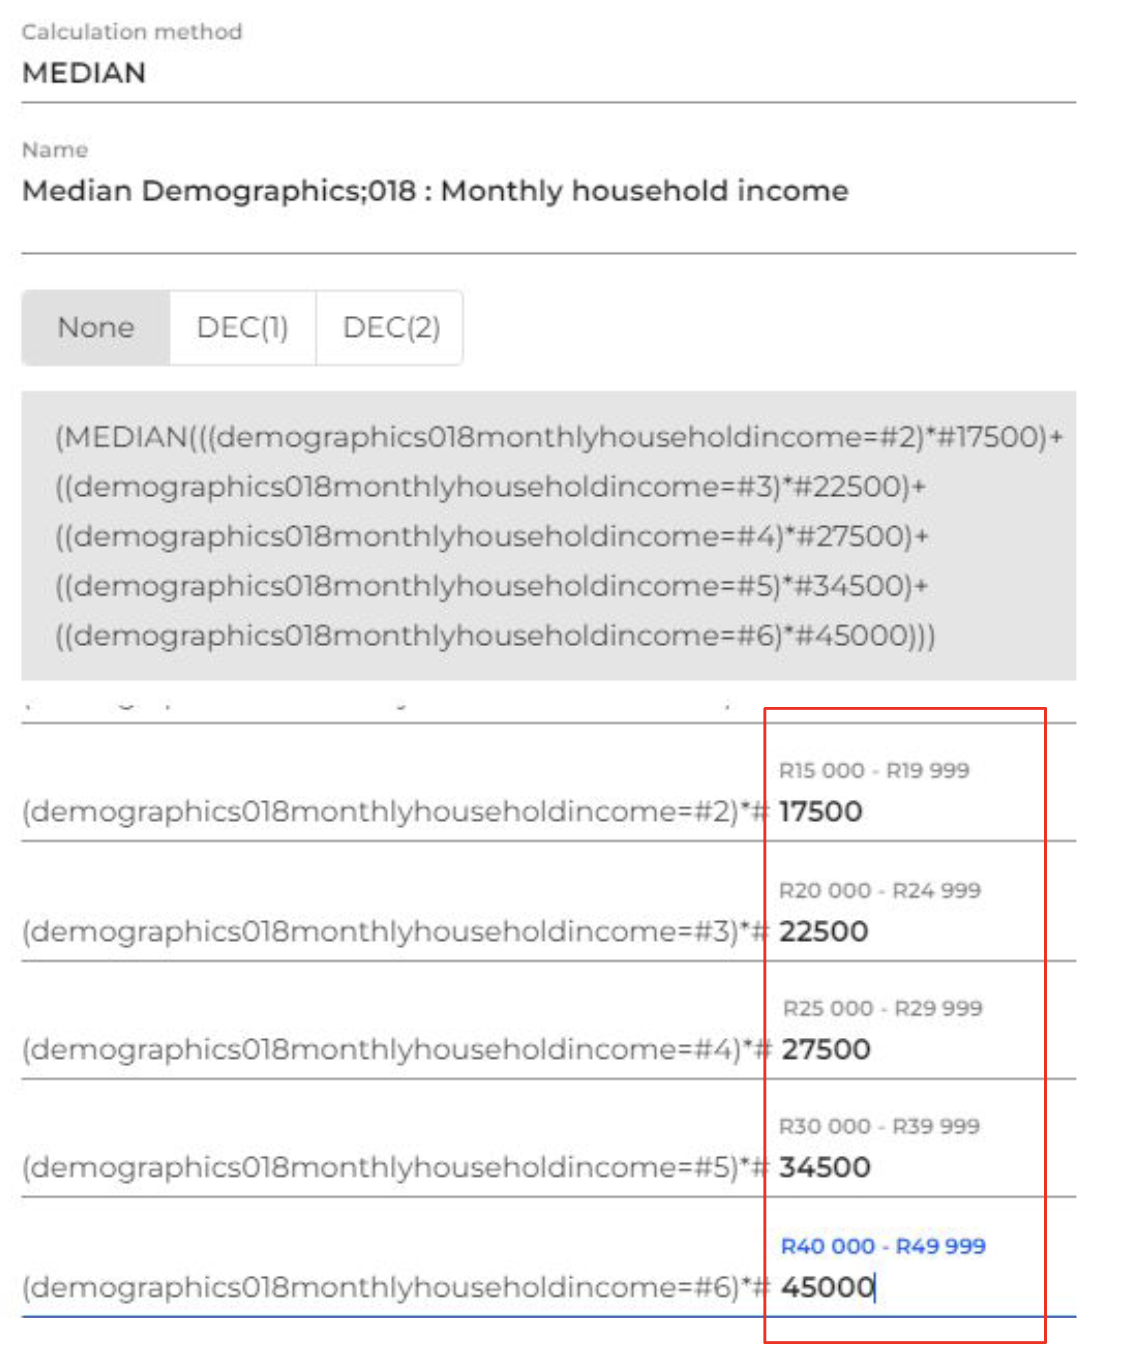
The application will keep the original data points (in this example the income brackets) as a reference once the midpoints have been entered.

Inverting questions and answers
- When editing the codebook, one can also invert either questions or answer. All questions under the category must have the same answers in order to use the Inversion function.
- The Inversion function, will change answers to become questions.
- Select the category consisting of the questions to invert, select the three dots and click on Perform inversion

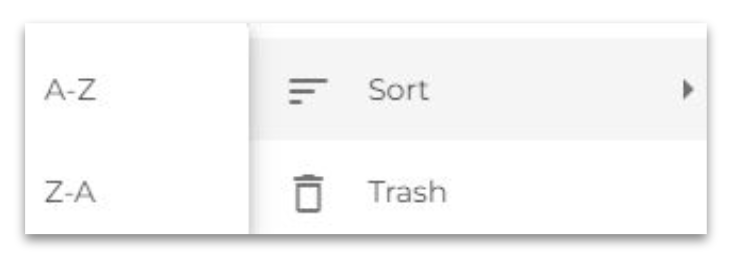
Sorting
- One can also sort answers either from A-Z or from Z-A by using the Sort option
2.2 Importing Codebooks
The Codebook Import functionality is essentially codebook memory (previously referred to as CTG file). It allows users to import a previously completed custom codebook into the new or latest wave of data.
This is particularly useful for tracker type data or proprietary datasets that have little changes between waves and enables recurrent and/or high-frequency data loading a fast and efficient process.
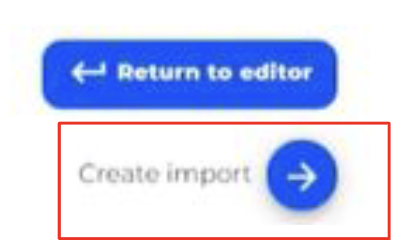
- In the Edit Codebook section, select the Import/From survey option.

- You will then be guided to the home screen to select the survey that already has the codebook design. Once you have selected the survey, click on Create import
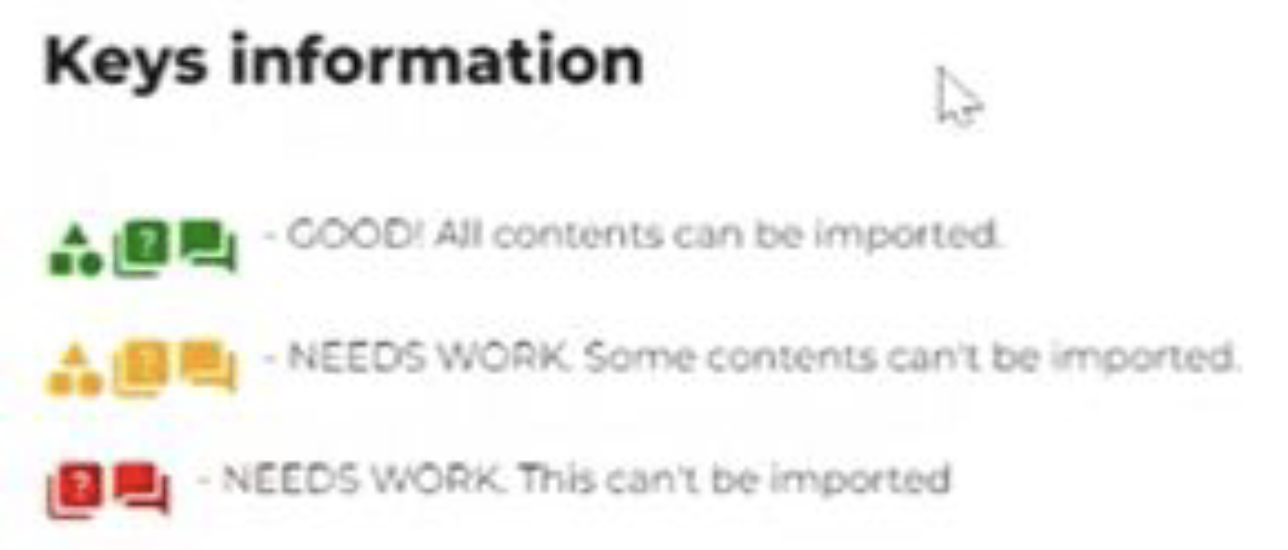
- Use the Codebook under review with keys to review which parts of the previously created codebook can be imported

- This key guide will show the status of the parts of the codebook which can or cannot be imported. Before completing the import you will receive a warning that the import cannot be undone

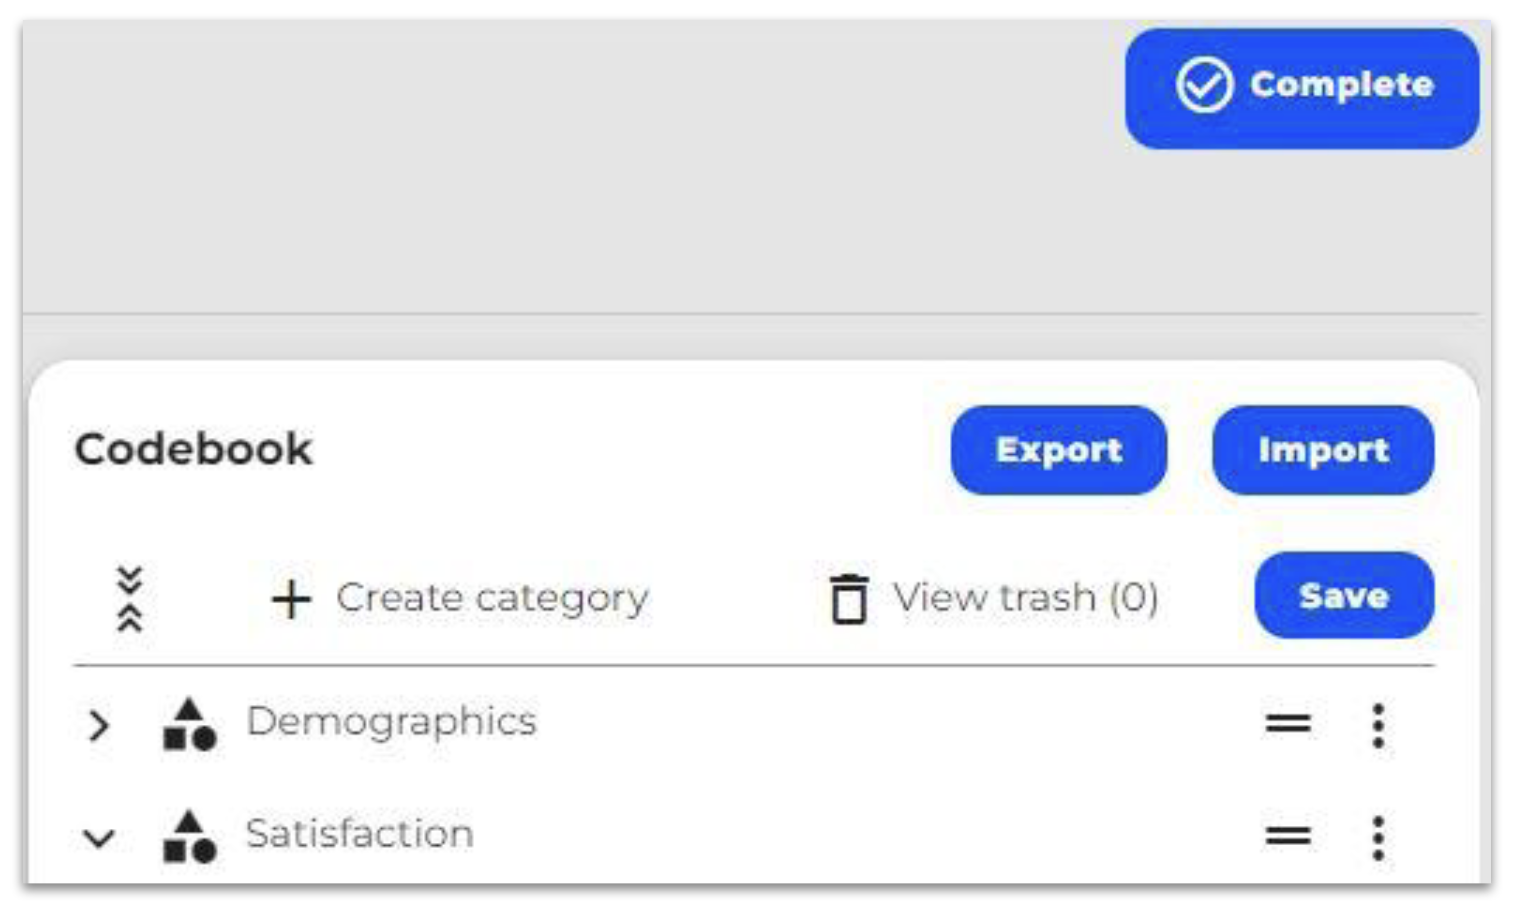
3. Completing and editing studies
- Once you are satisfied with the codebook structure and settings, you can complete the study by selecting the Complete button on the top right corner.
- You also have the option to edit or amend completed studies by simply opening the data and selecting the Edit button on the top right corner.

4. Defining survey settings
Add and adjust weights and population units
Typically weighting is used to match the population profile to get as representative a sample as possible (each respondent in the sample is representing a number of individuals) or to correct sample imbalance. In DataLoader, navigate to select weight section.
Update population unit
The first option is to select the population unit. Select the adjustment from the drop down, choosing from 1-10,000 and click the Update population unit to implement the adjustment
Adding weights
- Provide a name for the weight (age/gender etc)
- Find and select the weight variable in the actual survey .
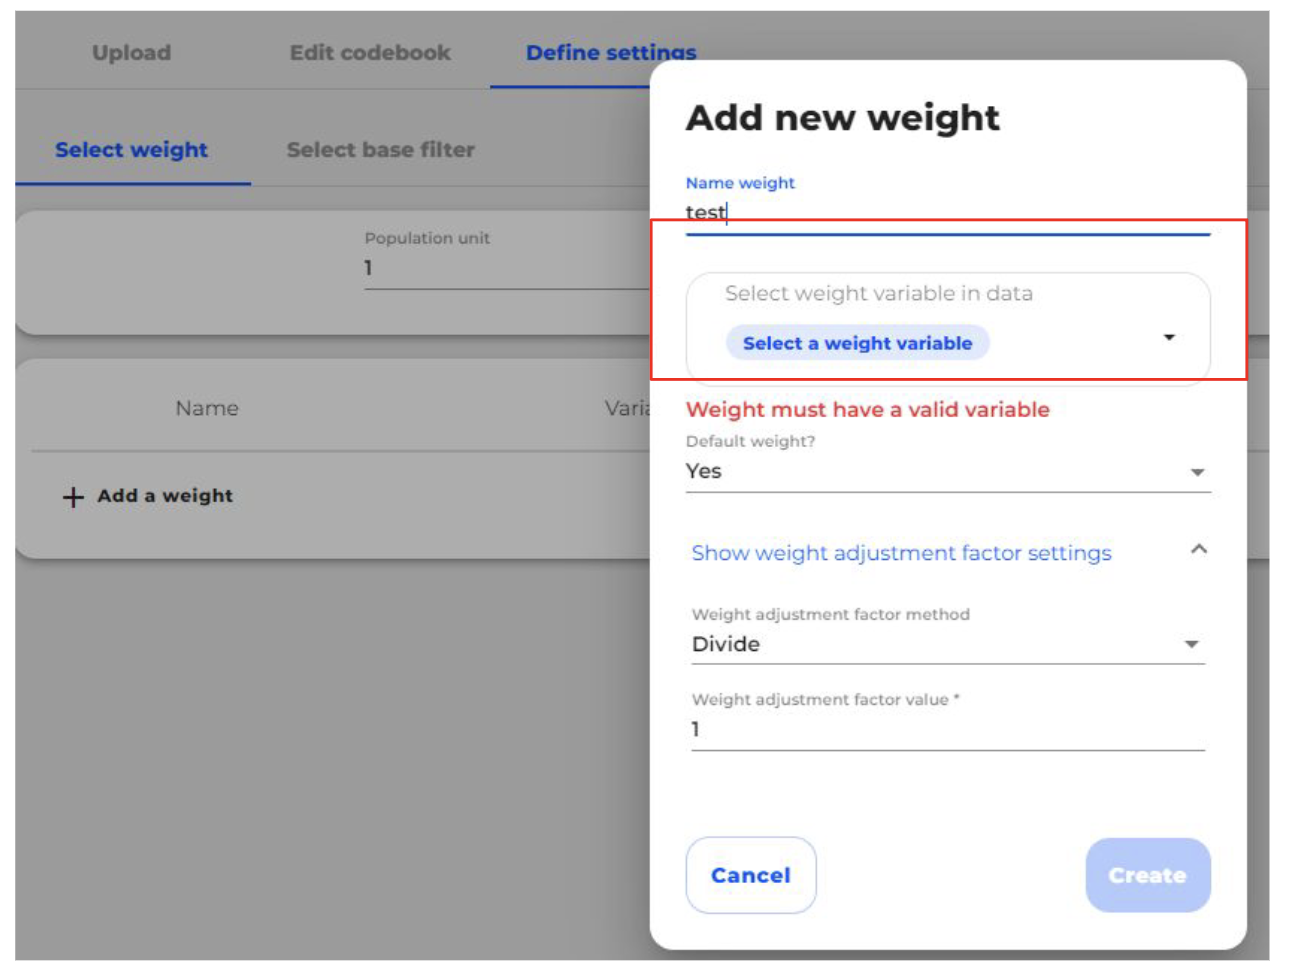
- Choose whether this is the default weight
- Set the weight adjustment factor method (either Divide or Multiply)
- Input the weight adjustment factor value
- Click Create once you have completed the selection
- Select the Complete button once all the weights have been entered
Add custom Base Filter to specific variables
Apply a custom Base Filter to a question to filter out the respondents by a chosen variable(s). For example, apply a filter of ‘aged 21+’ to Frequency drinking alcohol question. This will filter out respondents under the age of 21 years that may have answered the question.
- Navigate to the Select base filter settings

- At the bottom part of the screen, select + Add base filter

- Select the question that will be used as the Base filter, in this example ‘smoker’ is the main filter, with the corresponding answer as ‘Yes’
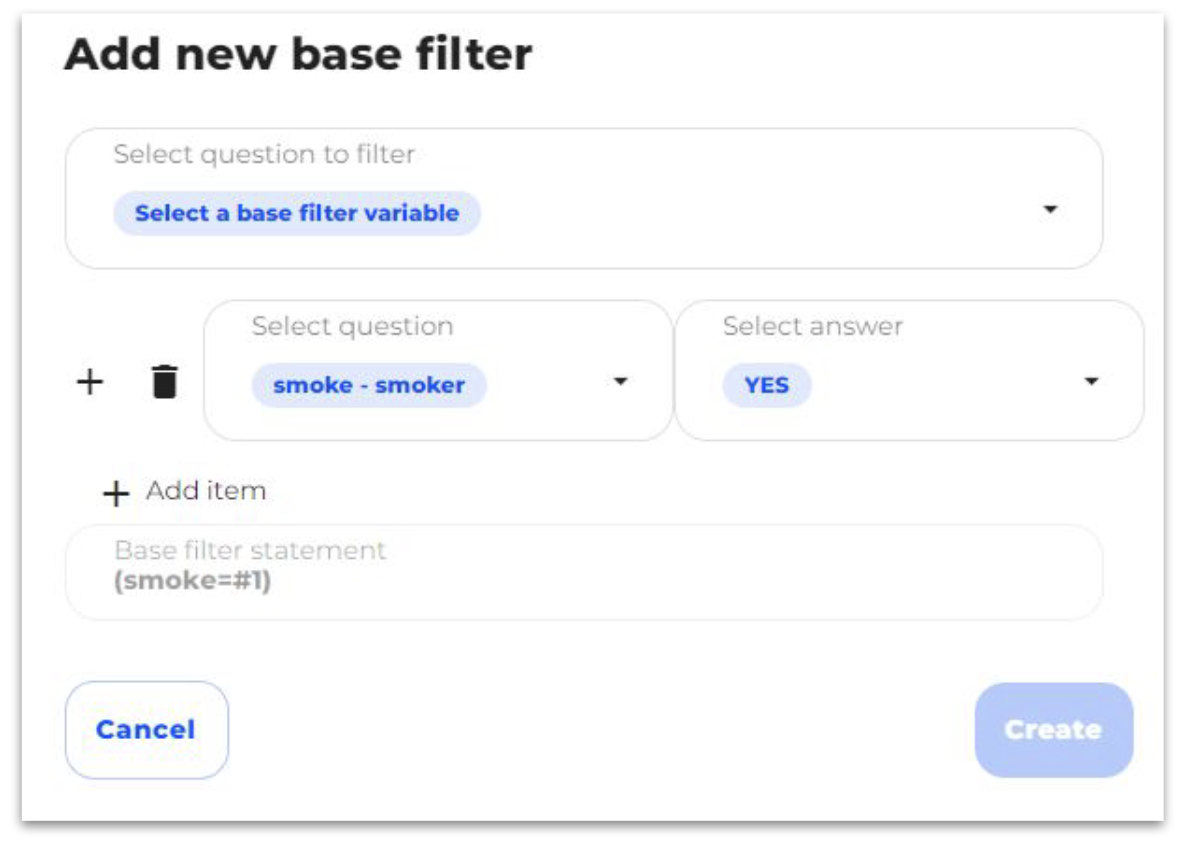
- Click on Create once the base filter/s have been added
Add default Base Filters to exclude ALL blank data
Apply a default Base Filter (variable=NOTBLANK(variable) to exclude ALL blank data (i.e. respondents that have not answered a question). This allows you to see only those respondents that have answered the question and provides a more accurate representation in crosstab analysis.
- In the Define settings options, select Set all to filter out blank data

- DataLoader will filter all questions that have NOTBLANK attached
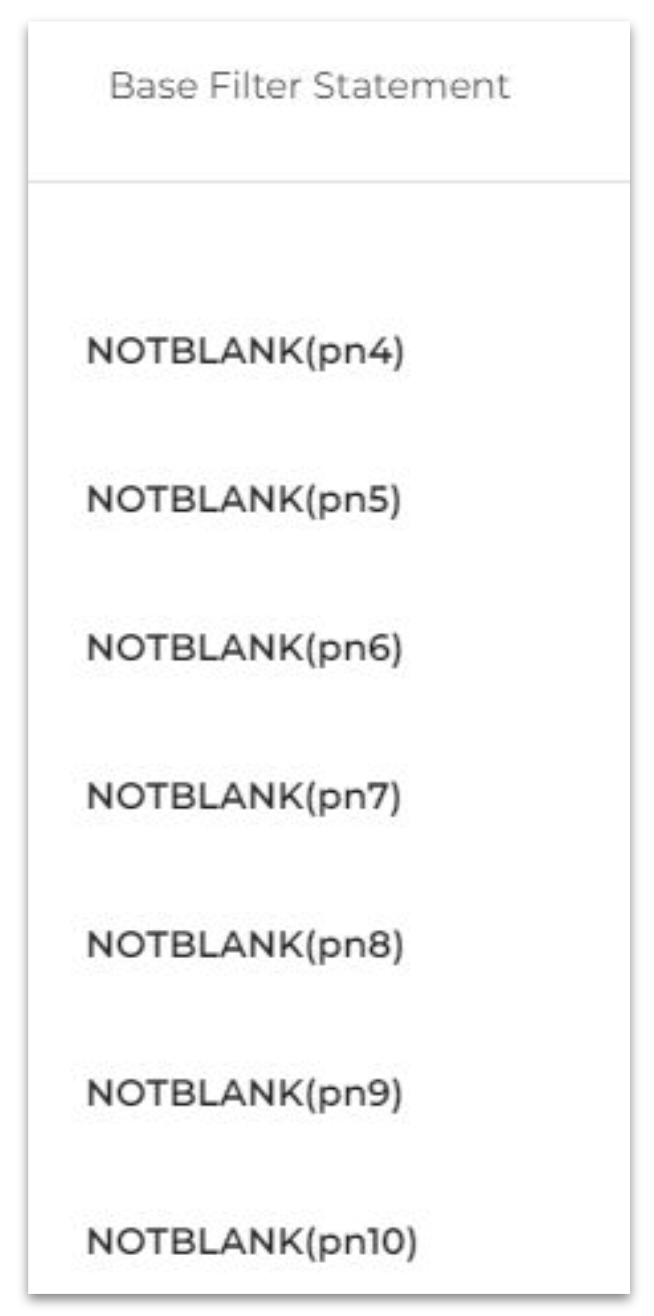
- The click on the Remove all not blank filters

5. Completing the upload
Once the codebook has been created and the Settings have been defined, the survey can be saved and exported to SurveyTime/Explore
- Once you have completed the survey code book structure and added the weights, click on Save
- Next, select the Complete button
- You will receive a warning message prompting you to confirm that this study is complete for uploading.
- Please be aware that once you have selected the Complete button, you will not be able to make any more changes.

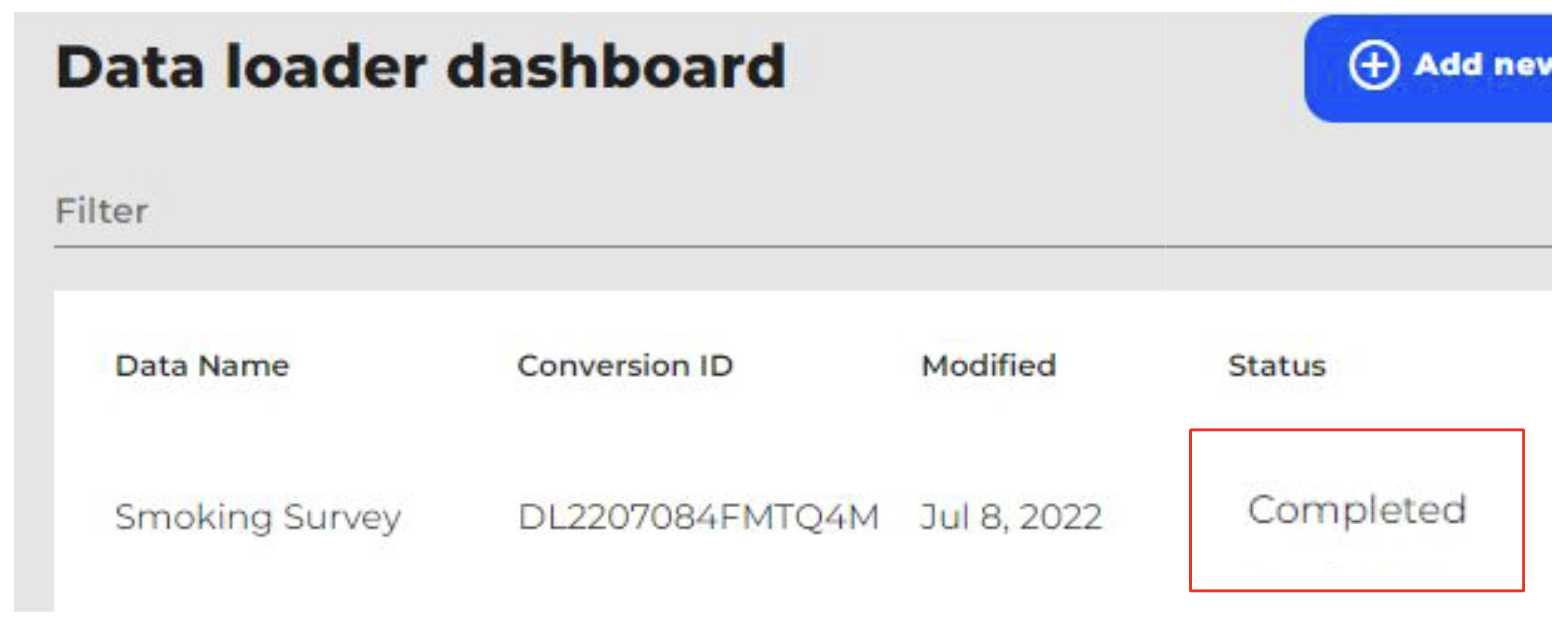
- You will then be notified that the data is being processed and that once the status changes to Completed, the survey can be used in SurveyTime/Explore
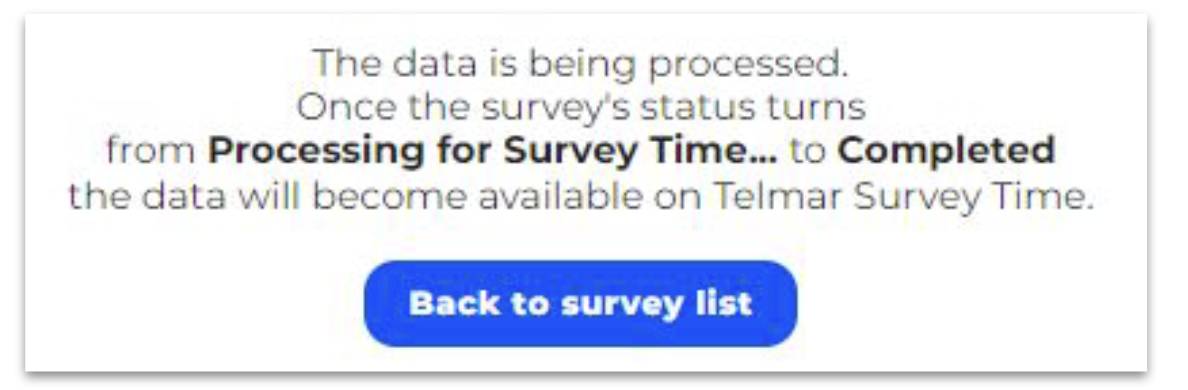
- In the survey list, the processing status will be displayed

- The message will change to Completed once the study has been imported into SurveyTime/Explore
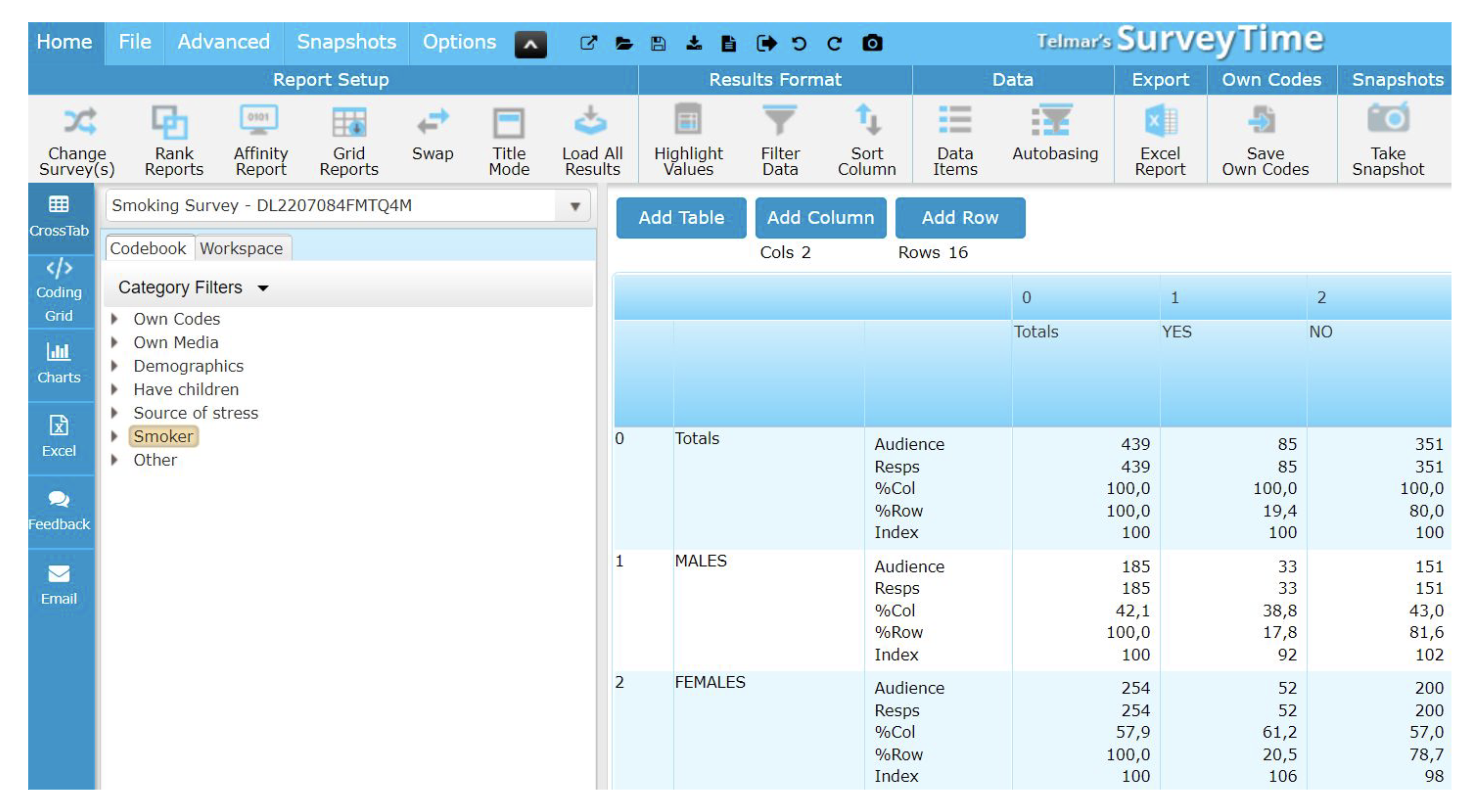
6. Using your survey for insights
- Once the upload is complete, navigate to SurveyTime/Explore, your survey should appear in the survey list.
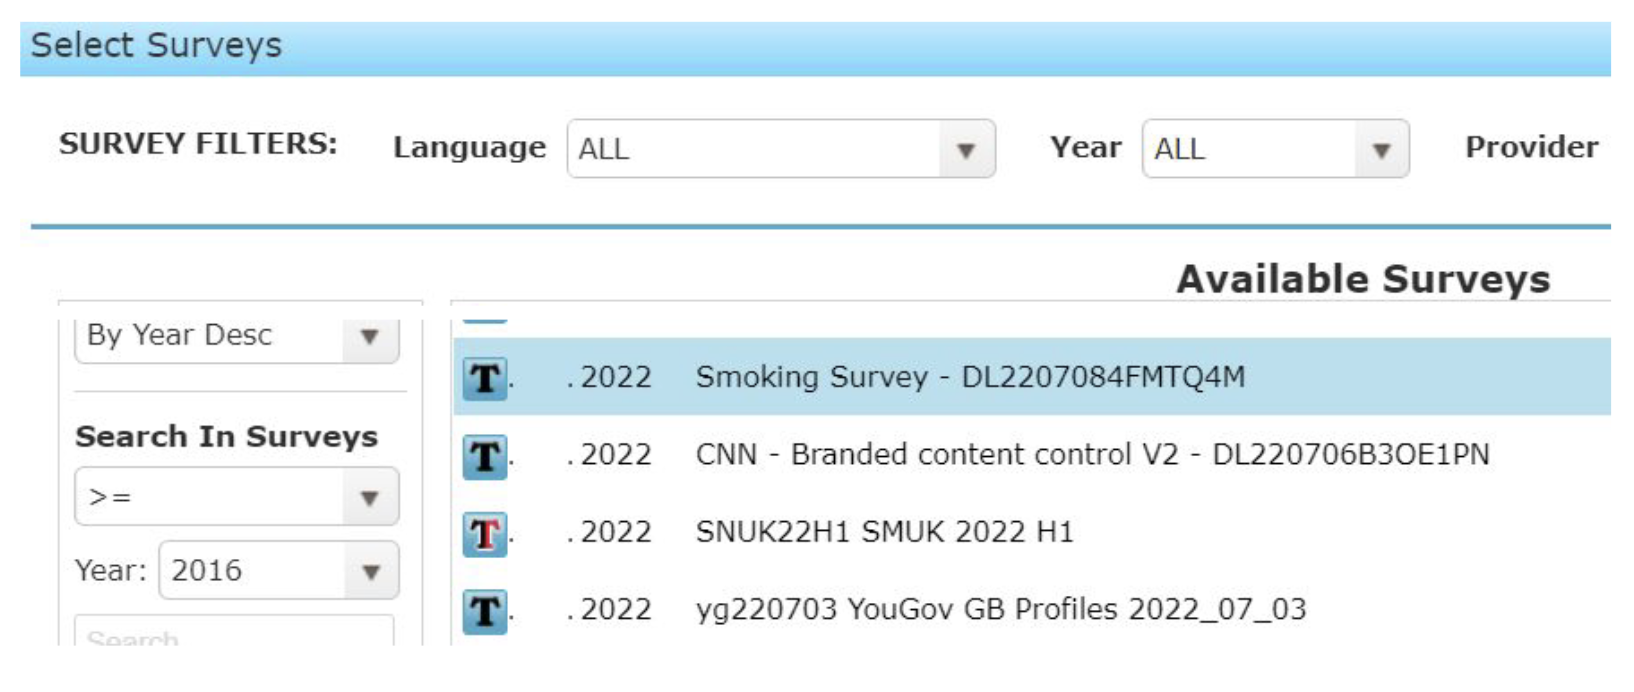
- If your survey is not yet displayed, click on the Refresh Survey List button on the top right hand side of the screen

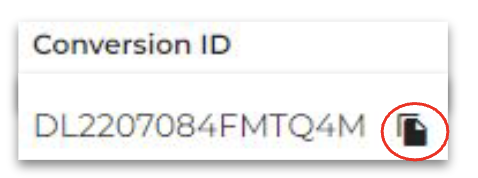
- If you have a lot of surveys in your survey list, you can conveniently copy the Conversion ID in DataLoader and use it to search for your survey in SurveyTime/Explore
- Select the survey and proceed to analyse the results in SurveyTime/Explore
- The survey upload is now complete